To get data from a CSV file into a simple XML document you would typically either write a small script or use another software application and get involved with schema's and so on.
However if you are already using Data Sync then you can make use of our built in features to either export to XML or create a new XML document to be used in a regular synchronisation.
Below we cover how you can sync data from a CSV file into a new XML document, how you can export data as XML, and how to connect to an existing XML file to use in your integrations. Although we specifically cover using data from a CSV file you can use any of our built in connectors to get data from your business systems. For example SharePoint, Salesforce, SQL Tables etc.

Requirements
Before getting started you need to ensure you have the following:
- Windows 10 or Windows Server
- Downloaded & Installed Data Synchronisation Studio (minimum version 3.0.2110)
- A CSV file with your data
If you do not have Data Synchronisation Studio you can get a free evaluation edition.
Connect to your CSV File
Start by opening Data Sync and connecting to your CSV file. You can do this either by dragging and dropping the CSV from the file explorer onto your source, or by clicking onto Connect Datasource > Text Files > CSV File and then browsing for your CSV by clicking onto the ellipsis in the FileName field.
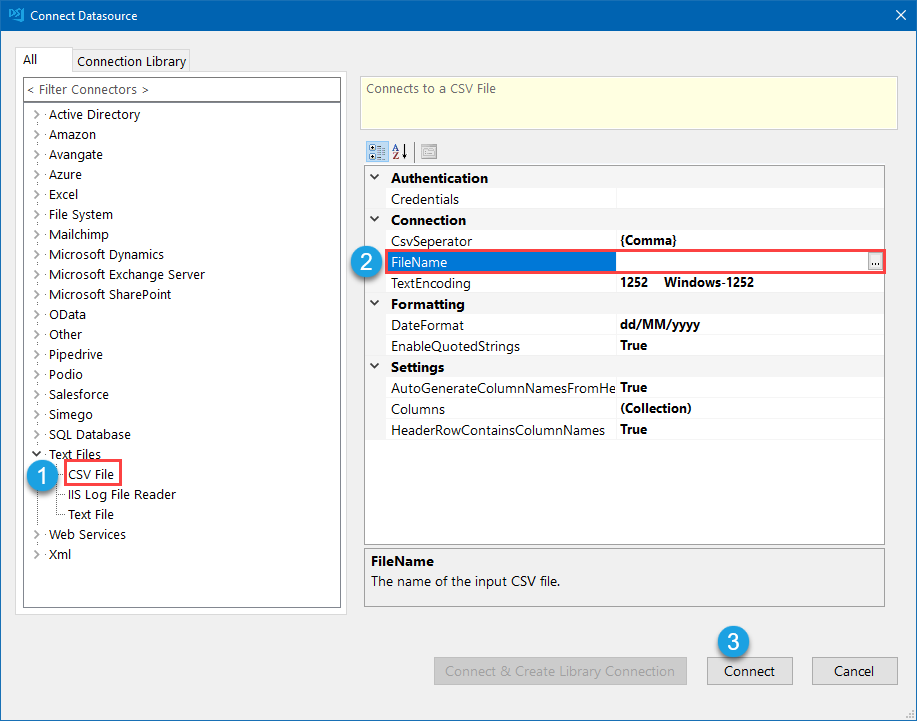
Click Connect to load the file into your source window.
Add the Columns to the Schema Map
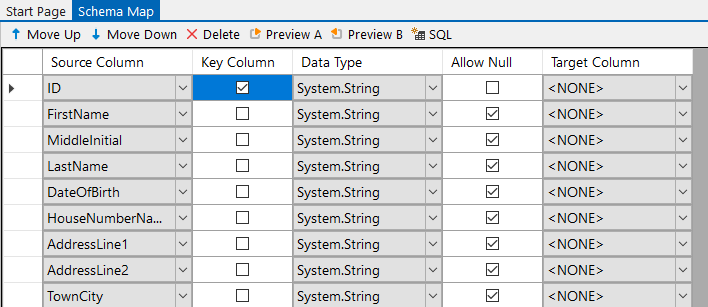
Before creating the new XML document you need to add the columns you want to include and create in the table to the schema map.
By default all the columns will be added but you can remove and re-order the columns as you need to. Make sure to include a key column that can be used to uniquely identify each record.
The new XML document nodes/columns will be created based upon what is included in the schema map.
Create an ID Column
If your data does not currently have an ID column that can be used to uniquely identify each record, then you can use calculated columns to create one. Calculated columns enable you to decorate your dataset with additional data.
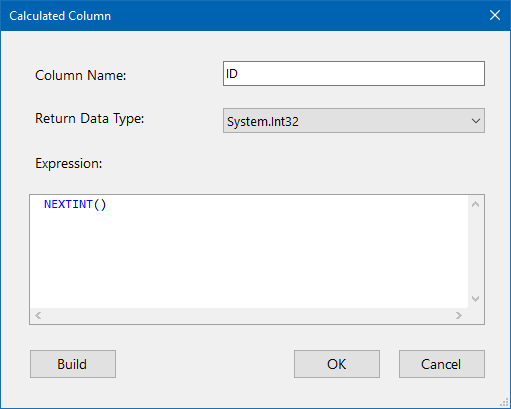
To do this click onto the fx button in the data source toolbar and then enter in a unique name for the column and set the data type. You can then enter in a function to decorate the data.
In this example we use NEXTINT(). The NEXTINT() function returns a number for each row, incrementing the value by 1 each time it is called.
For more examples of the functions you can use with calculated columns please see our documentation pages.
Create the XML Document
There are two options available when creating a new XML document. If it is a one time sync then you can export the data from the preview window, alternatively if it is going to be a regular sync then you can create an XML file from the Tools menu.
Export to XML from Preview
To export from the preview window, click Preview A in the toolbar of the schema map window or click onto the preview button in the source window.
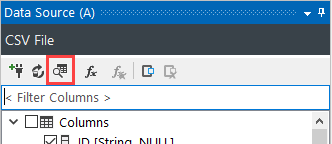

and then click onto the Export XML button.

Create New XML Document from Menu
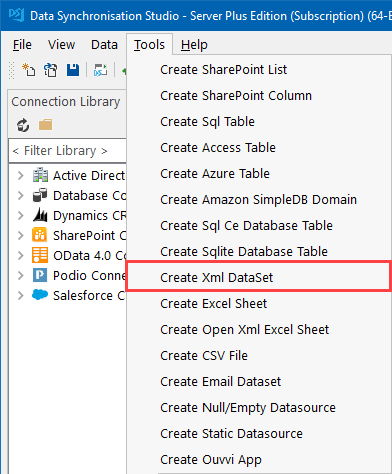
To create a new XML from the tools menu, go to Tools > Create XML DataSet.
This will open the XML DataSet Wizard where you need to select where to create the file and enter in a name for the file. To do this click onto the ellipsis to open the file explorer, navigate to your destination and enter in a name for the file.
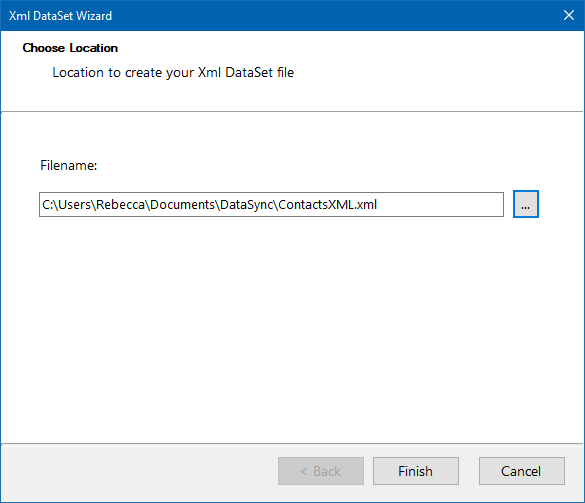
Click Finish to load the file into the target window. The columns created will be based upon the columns added to the schema window.
Connect to an Existing XML Document
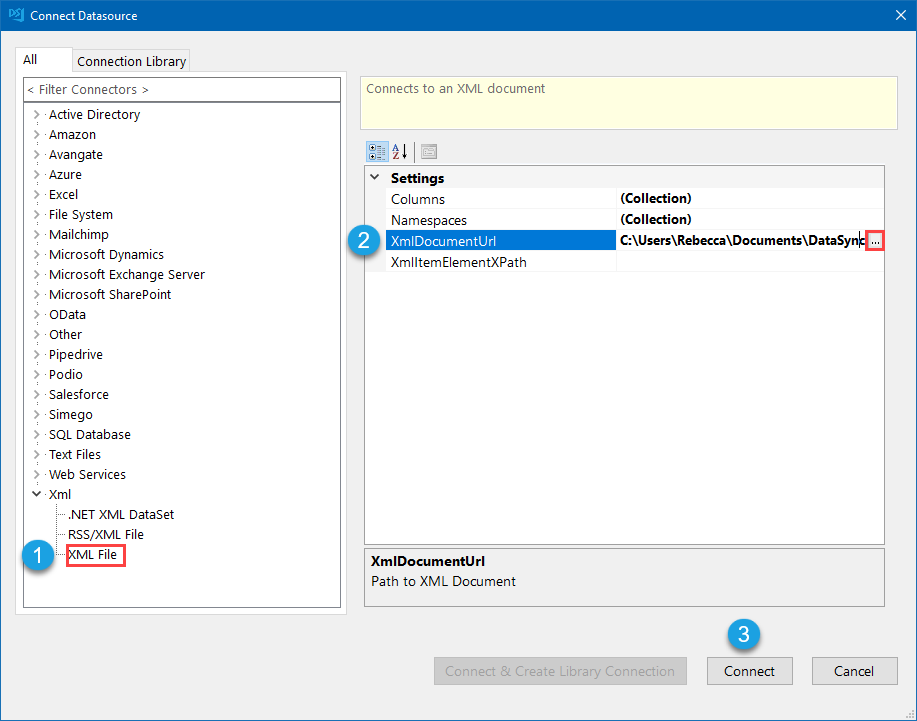
If you already have an XML file that you want to connect to, click onto the target window to open the connection window.
Then go to Xml > XML File and browse to your file by clicking onto the ellipsis in the XMLDocumentURL field. Once you are done click Connect to load the datasource.
Compare the Results and Sync
Once your schema map is configured and a key column selected you can compare the differences between your CSV and the new XML Document.
As this is the first sync there will only be additions to make.
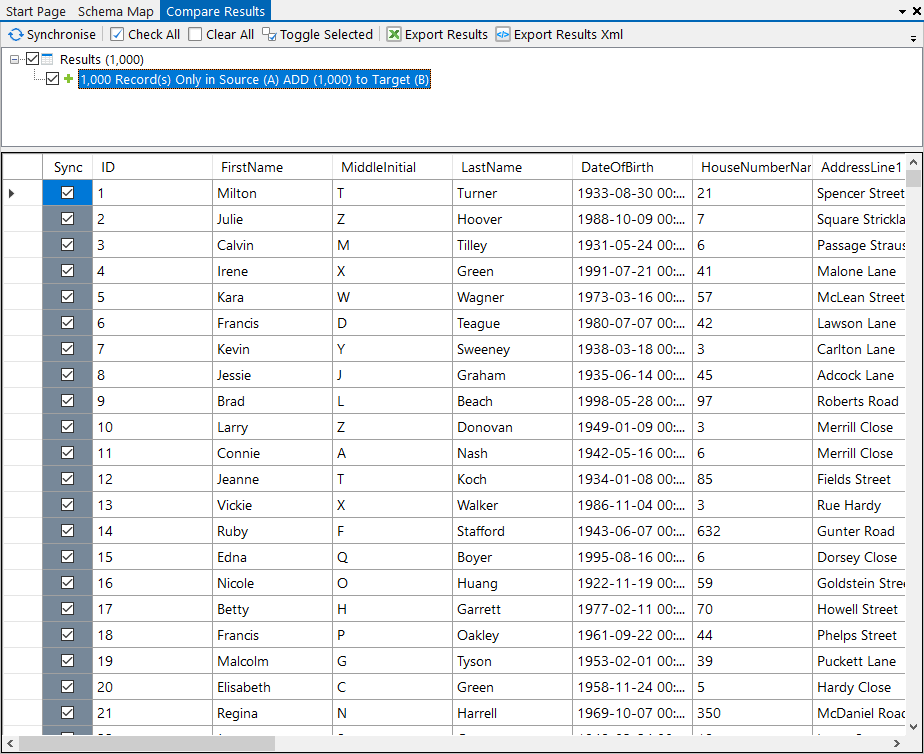
For any future runs of this project or if you are connecting to an XML file that already contains data, then you may also notice updates and deletes.
Please note that deletes are disabled by default but will still show in the results. These can be enabled by changing EnableDelete to True.
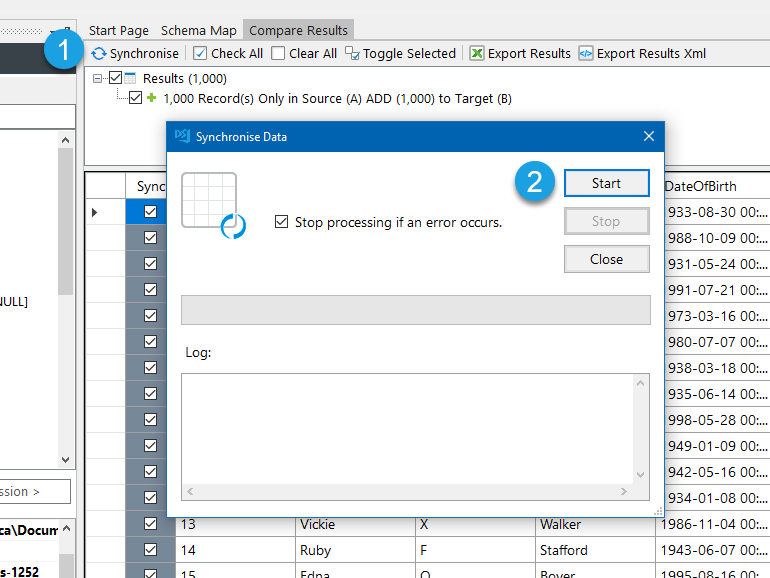
To add the records to the XML file click Synchronise and then Start to begin the sync.
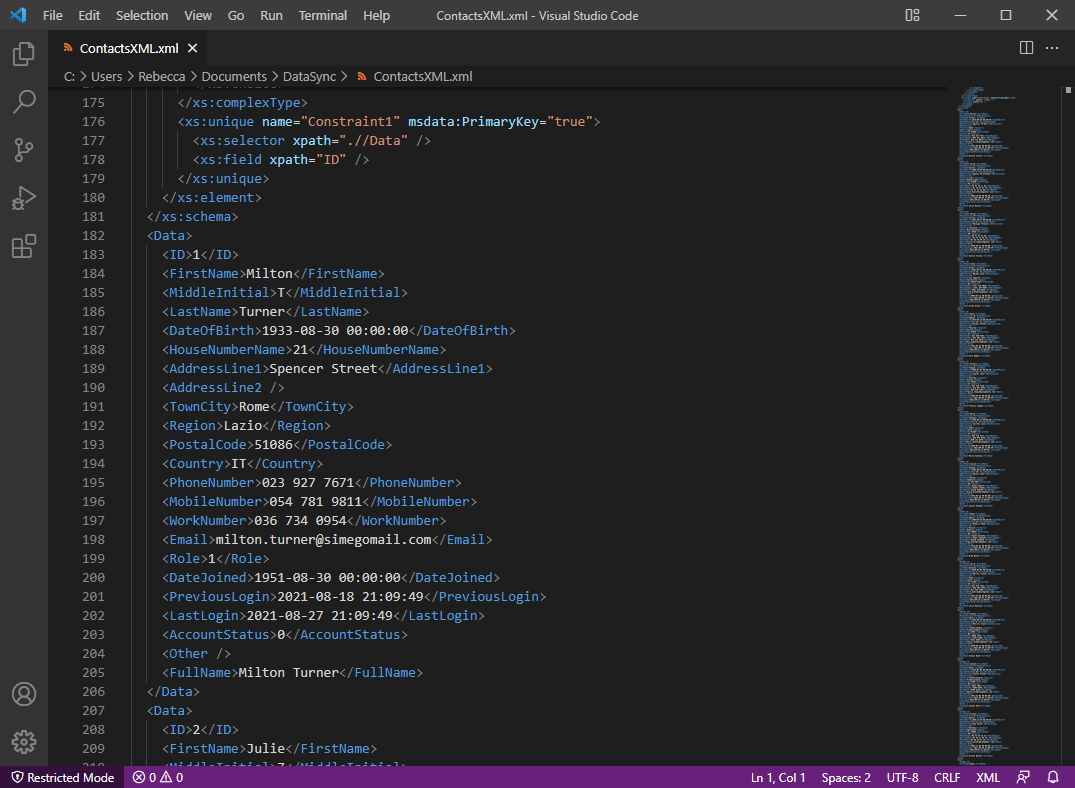
The records will then be visible in the XML document.
Make sure to save your project so that you can use it again in the future. You may wish to schedule it using the Run Tool or Ouvvi.
If you want to import a CSV file to a new SQL table, please see our other blog post, or send us an email if you have any questions.