Import a CSV File into a SQL Table
A common integration task we find that most of our customers need to do is importing data from a CSV file (or another file type) into a SQL table.
Sometimes you may already have a SQL table ready to receive your data or you may need to configure a new table. With Data Sync either is possible and creating a new SQL table is as simple as adding your columns to the schema map, clicking create and connecting to your SQL Server.
Below we cover how to import a file such as CSV into a new SQL Server Table with Data Synchronisation Studio.
Although we cover a CSV in this article we can also import other file types such as: XML, XLSX, XLS, SDF (SQL Server Compact), TAB, MDB (Microsoft Access Database files) and many others.

Requirements
Before getting started you need to ensure you have the following:
- Windows 10 or Windows Server
- Downloaded & Installed Data Synchronisation Studio
- A CSV file with your data
- Access to a SQL Server or SQL Express instance
If you do not have Data Synchronisation Studio you can get a free evaluation edition.
Connect to your CSV File
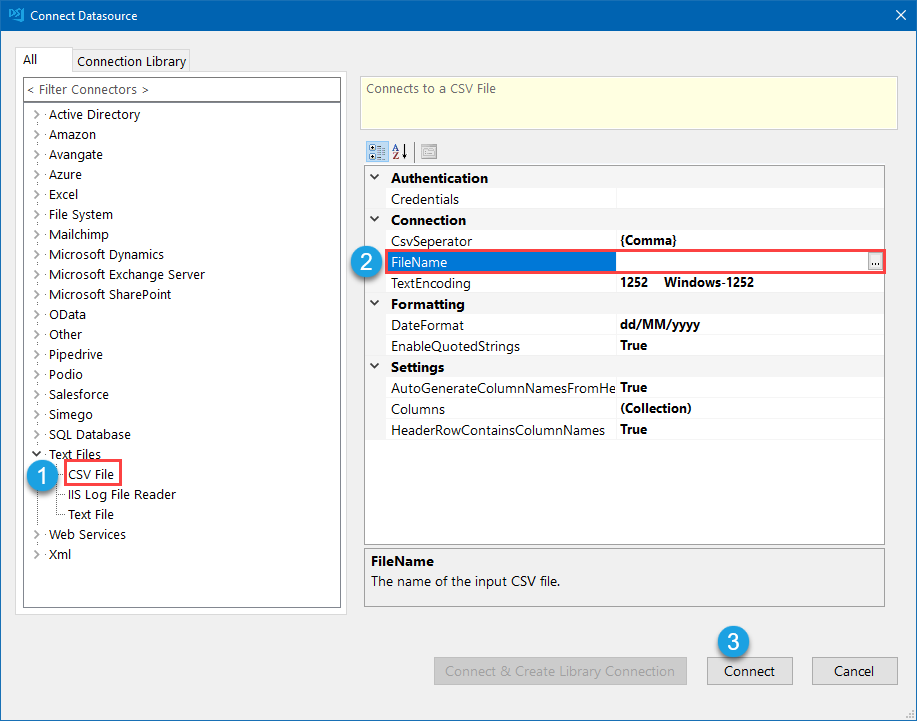
Start by opening Data Sync and connecting to your CSV file. You can do this either by dragging and dropping the CSV from the file explorer, or by clicking onto Connect Datasource > Text Files > CSV File and then browsing for your CSV by clicking onto the ellipsis in the FileName field.
Add the Columns to the Schema Map
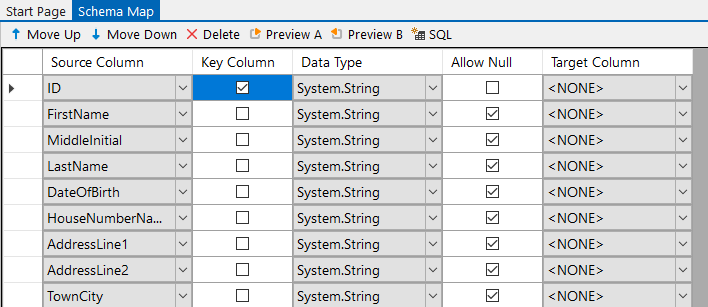
Before creating the new SQL table you need to add the columns you want to include and create in the table to the schema map.
By default all the columns will be added but you can remove and re-order the columns as you need to. Make sure to include a key column that can be used to uniquely identify each record.
The new SQL table columns will be created based upon what is included in the schema map.
Create a SQL Table
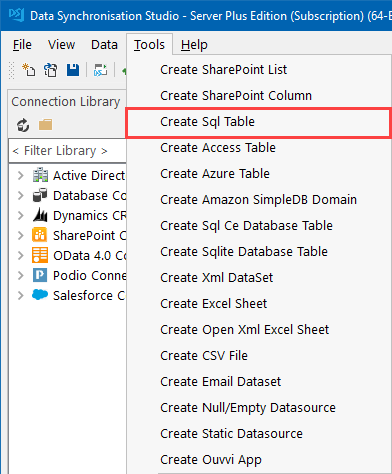
To create a new SQL table you can go to Tools > Create SQL Table.
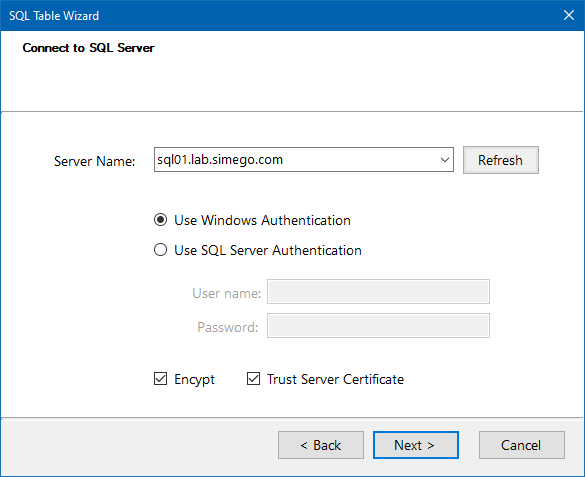
Then follow through the wizard to connect to your SQL database. Start by entering the network name of your SQL server and enter in any credentials needed to connect, then click Next to select your database and configure your new table.
Select the database to create the table in from the drop down menu and enter in a name for your table. The table name needs to be unique and not exist in your database already.
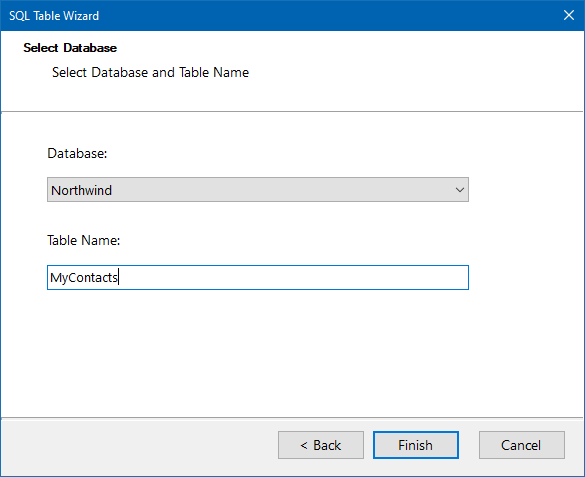
Your SQl table will then be created and ready to sync data to.
If you would like more control over how the table is created then checkout our blog on the SQL Script Generator.
Connect to an Existing SQL Table
To connect to an existing SQL table click onto the target window to open the connection window and go to SQL Database and select the relevant connection type. For most SQL Servers using the SQL Client provider will be sufficient, but for details on the other providers please see our documentation here.
Enter in the network name of your SQL Server to the Server Name field. This can be a SQL Instance i.e. SQL01\SQLEXPRESS or you can also specify the TCP protocol and port i.e. tcp:SQL01\SQLEXPRESS, 1433.
You can specify additional connection properties by opening the Additional Connection Properties tab.
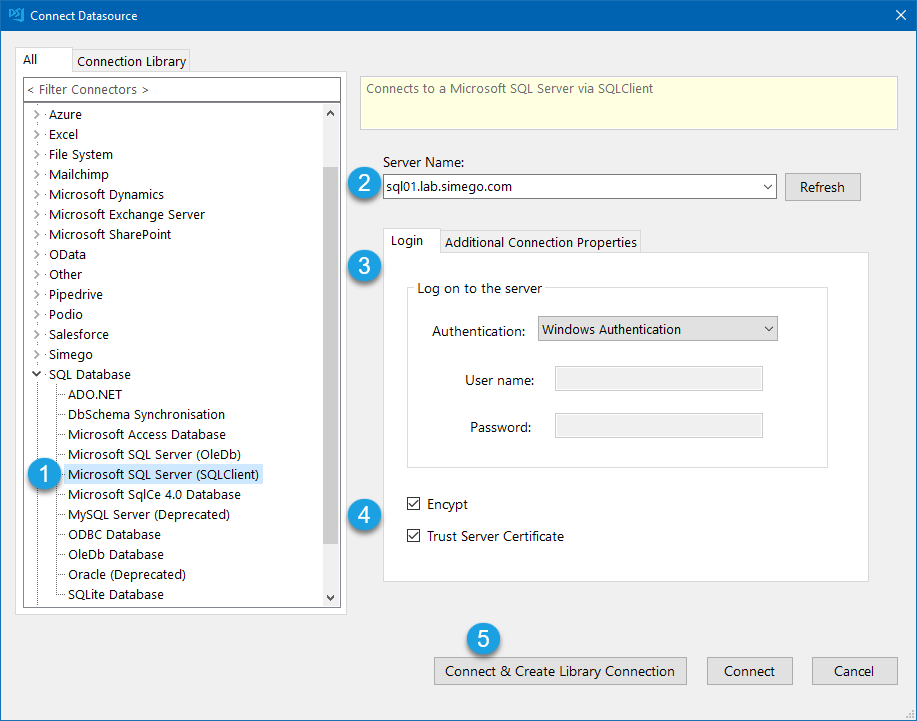
Save the connection for using again later by clicking onto Connect and Create Library Connection, this will first open a window where you need to select the database and table to connect to.
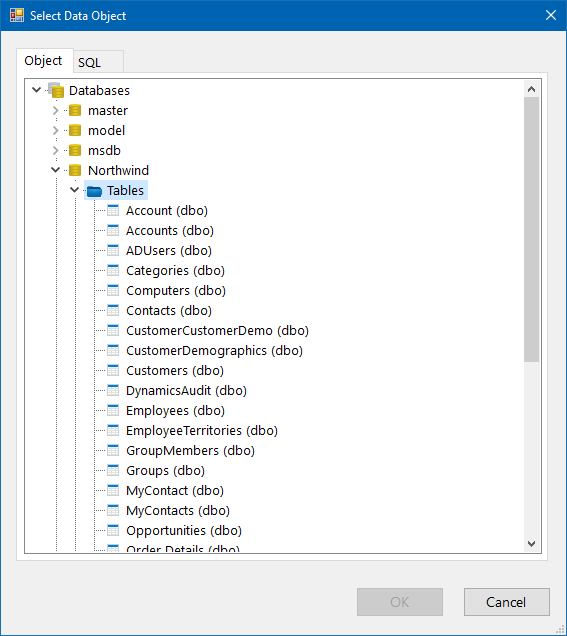
Clicking OK will then open the window where you can specify the name for your connection. This only needs to be done once per database, and you can access this connection for future projects from the connection library window.
Now map your target columns to their corresponding column in the CSV file in the schema map window before moving onto the next step.
Compare the Results and Sync
Once your schema map is configured and a key column selected you can compare the differences between your CSV and the new SQL table.
As this is the first sync you will only have add actions to make.
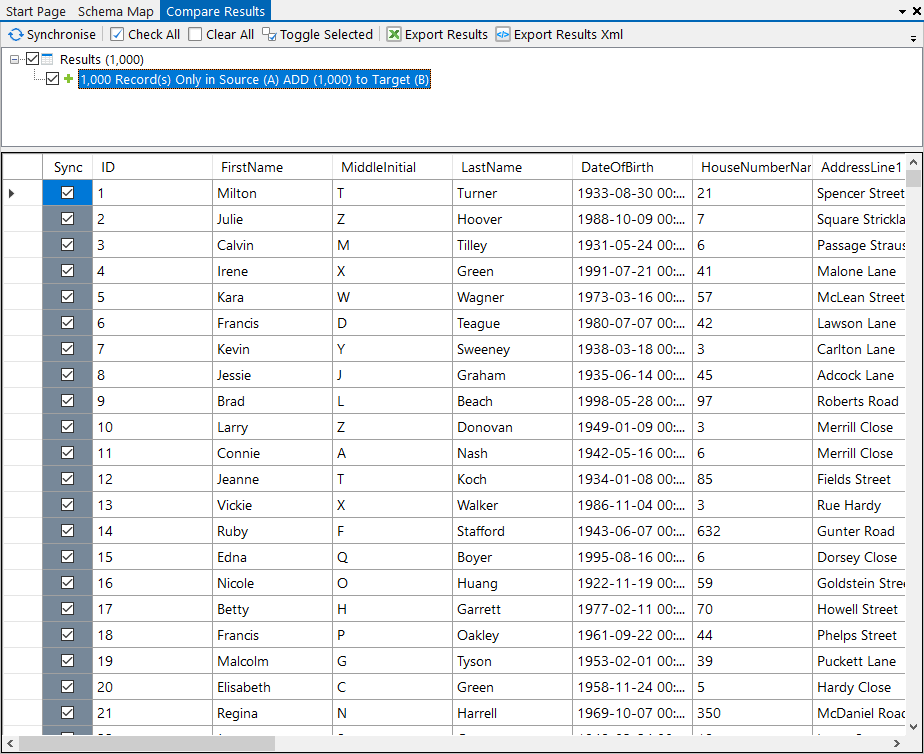
For any future runs of this project or if you are connecting to a table that already contains data, then you may also notice updates and deletes.
Please note that deletes are disabled by default but will still show in the results. These can be enabled by changing EnableDelete to True.
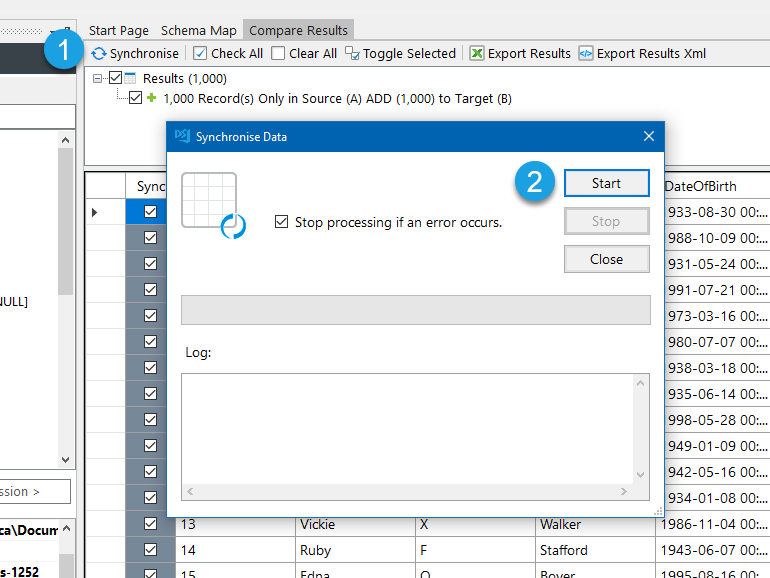
To add the records to the SQL table click Synchronise and then Start to begin the sync. Your records will then be available to view in your SQL table.
Make sure to save your project so that you can use it again in the future.
