SharePoint List and SQL Table 2 Way Synchronisation
Here we're going to cover how you can use Ouvvi and Data Sync to automatically copy data from a SQL table to a SharePoint list and update the SQL table if any data is updated in the SharePoint list.

We list below a few considerations you need to make when looking to perform a 2 way synchronisation, and suggest using Ouvvi to manage the whole process.
Ouvvi will enable you to determine the order of execution, keep a full log record of each project run and if it is enabled view any changes that were made.
Requirements
Before getting started you will need to ensure that you have the following:
- Windows 10 or Windows Server
- Downloaded & Installed Data Synchronisation Studio
- Have installed Ouvvi Automation Server
- Have access to SharePoint Online
- Have access to a SQL Database
If you do not have Data Synchronisation Studio you can get a free evaluation edition. If you are on a trial and would like to test Ouvvi please send us an email and we can get you started.
Considerations
Performing a two way sync can be a complicated process and there are multiple factors you need to take into consideration.
When configuring a two way sync for the first time you should always start from a synchronised state. This can mean either the source and target are exact matches when running the sync for the first time or the target is blank and needs the records adding. It is preferable to start with the target as empty.
You need to consider the order of execution, which projects need to run before the others.
This feeds into the next consideration which is that you need to consider which source will be the main list as you do not want to override data. You should have your first project with the source as your main list. This can be set to perform additions, updates and deletions. However the second project should only perform update actions, otherwise you could accidentally remove newly added records or add records that should be deleted.
This will allow you to use the first project as a restore function if any deletes or adds are made in the target (SharePoint) by users when that list is not meant to be manually added to etc.
If you enable deletes on the first project, you need to understand that this will remove any records that are present in your target but are not found in your source data. We recommend not enabling deletes unless you are confident and have thought about every scenario.

You also need to ensure that both your source and target datasets have a column containing a modified or updated time stamp. You need to have some way of recognising that data has changed and should be updated on the target, or that the data in the source is out of date and shouldn't overwrite the data in the target.
In this example we connect to a SharePoint List, for SharePoint you cannot write to the ID column so you need to ensure that there is a column that can be used for a unique ID. This unique ID is so that each record can be identified and not appear as a duplicate if they share a name or other column data. You can use something other than an ID however you must make sure that it is unique.
A 2 way sync can be useful to have for data repair, e.g if a record is accidentally deleted in SharePoint then the record from the SQL table can be written back into your SharePoint list.
You also need to consider, if you are using Ouvvi, whether to enable or disable change sets. Change sets are very useful for checking that the data being synchronised is correct. However if you expect a high volume of data then we recommend disabling them as they can fill your Ouvvi database and cause your project to run slower.
Create the Project in Ouvvi
To get started browse to your Ouvvi site and create a new project to organise and manage your steps. If you have not yet setup Ouvvi please see our training pages to learn how to get up and running.
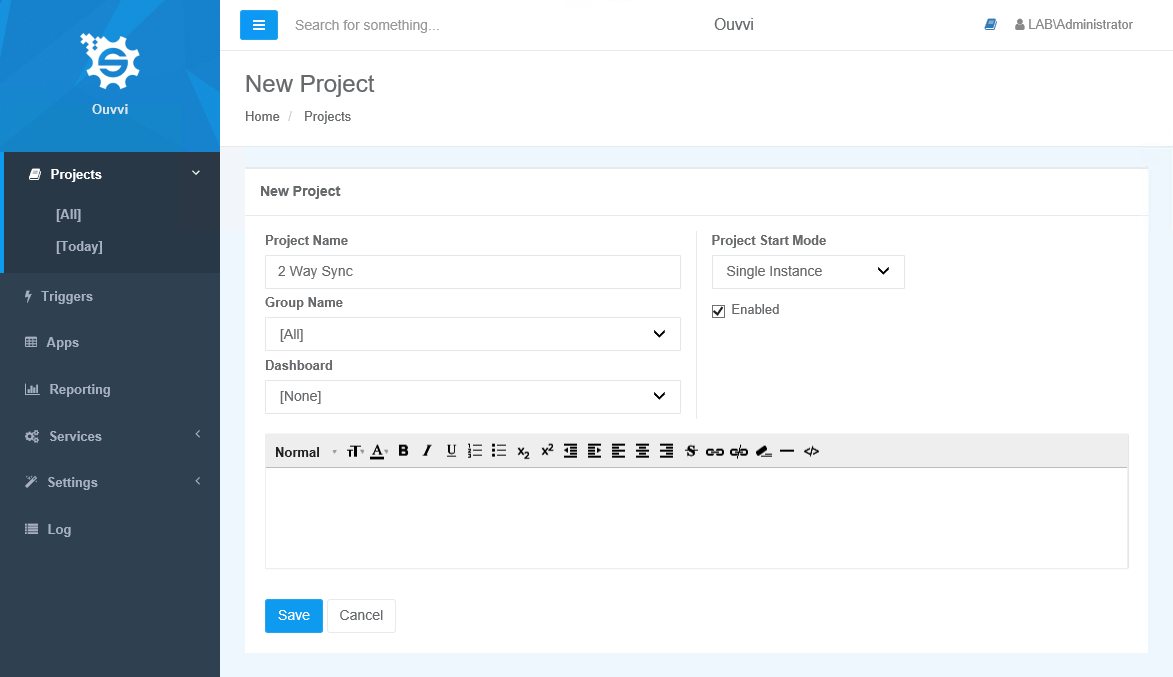
For this project we are going to have 2 steps. The first will be a Data Sync step to synchronise the data from our SQL table to the SharePoint List. The second will be another Data Sync step to synchronise any updates from the SharePoint list back to the SQL table.
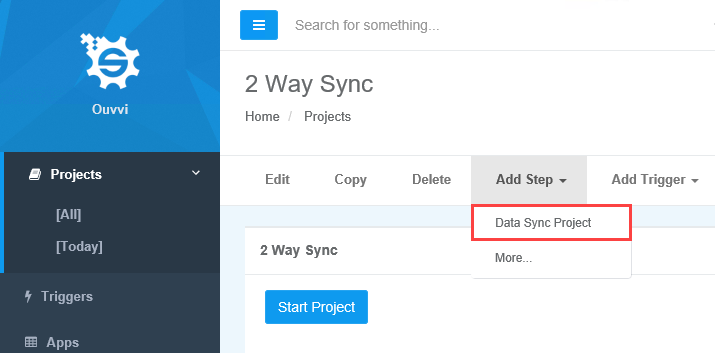
To add the first Data Sync step to our project click onto Add Step and select Data Sync Project from the list.
Enter in a name for the step and then click Save. You can also type in a description to let others know what the project is doing.
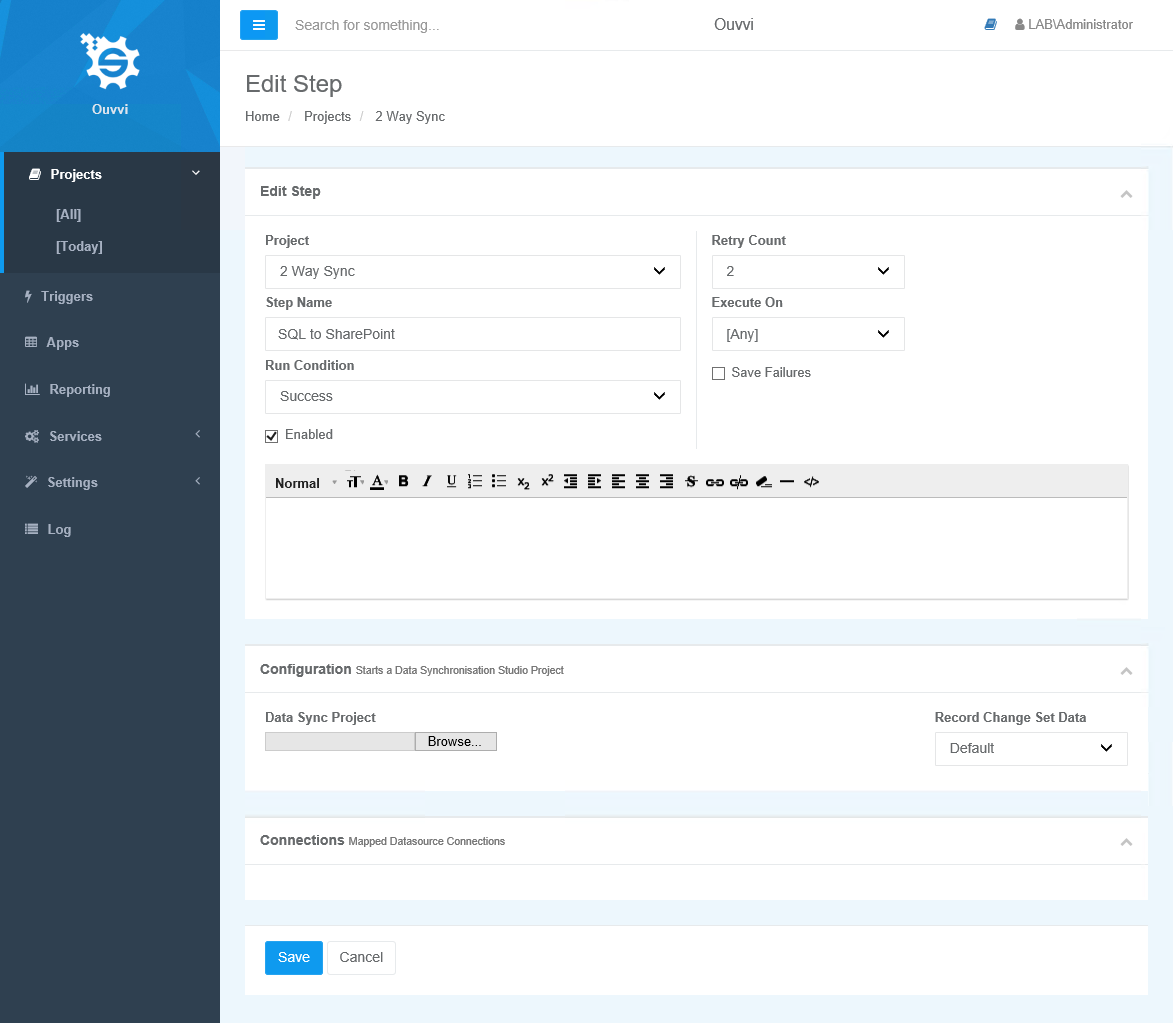
You are now ready to configure this step to do the synchronisation from SQL to SharePoint.
Configure the SQL to SharePoint Step
You need to start by opening Data Sync from your Ouvvi site.
To do this click onto the Open Project button in the toolbar. This will open Data Sync whilst remaining connected to Ouvvi.
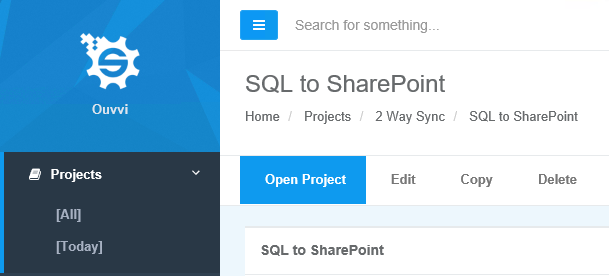
Now connect your source to your SQL table, and your target to your SharePoint list. You will need to use the Custom Azure App method and grant the permission All Sites - Full Control, this will need admin approval but is needed to write to the modified column in SharePoint. You can find the full connection details for connecting to SQL here and connecting to SharePoint here.
Configure the Schema Map
Now configure the schema map to include the columns you want to update. Make sure to select a key column that is unique and can be used to identify each record.
We find that an ID column is usually the best option for your key column.
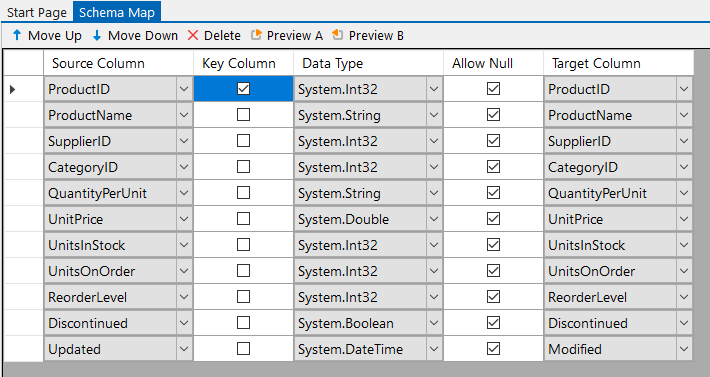
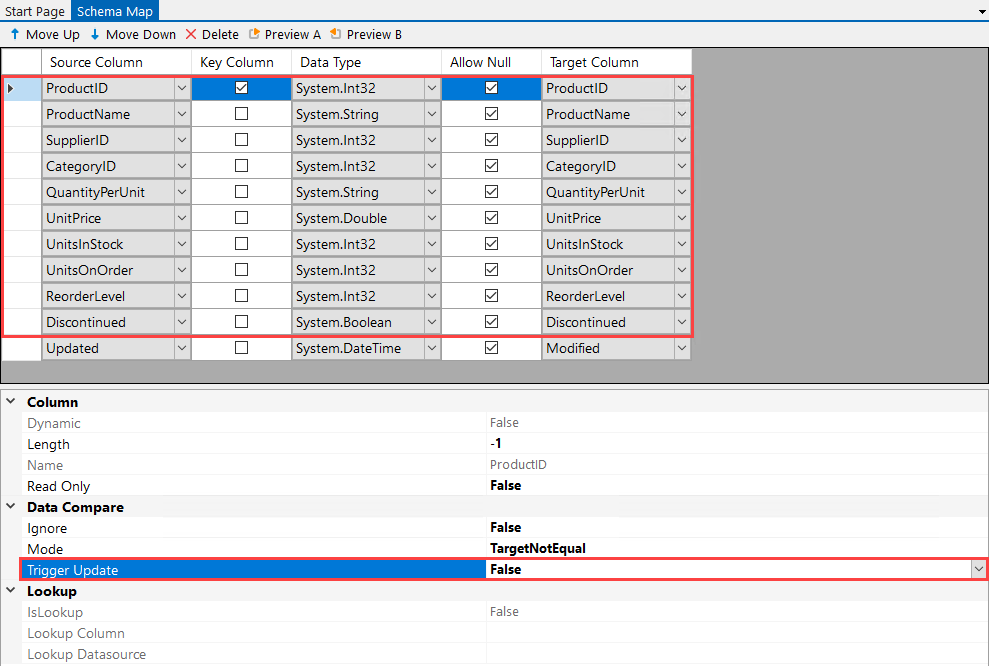
You then need to set the schema property TriggerUpdate to False on all the columns that are not the time-stamp. As you do not want older records to overwrite newer records in SharePoint.
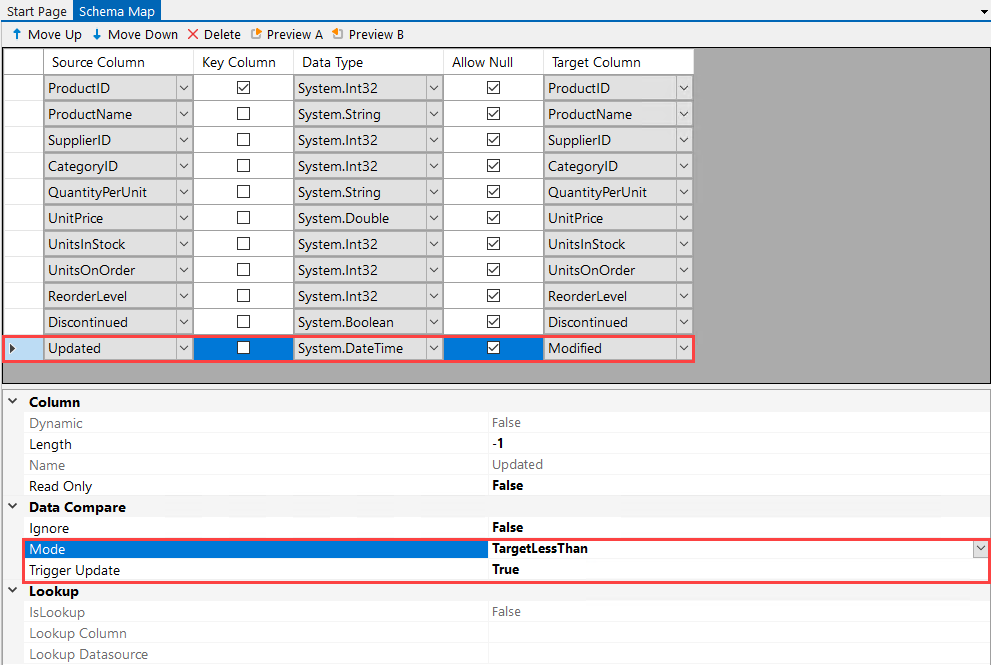
And then on the time-stamp column ensure the schema property TriggerUpdate is set to True and the Mode is set to TargetLessThan, so that only records that are newer are written to SharePoint.
Compare and Sync
Now run the compare by clicking the Compare A > B button and make sure to check the results. In this example we have 77 records to add to SharePoint.
Note that for future runs deletes are disabled by default but will still show in the results. If you would like to enable deletes then make sure to set EnableDelete to True on your target connection properties.
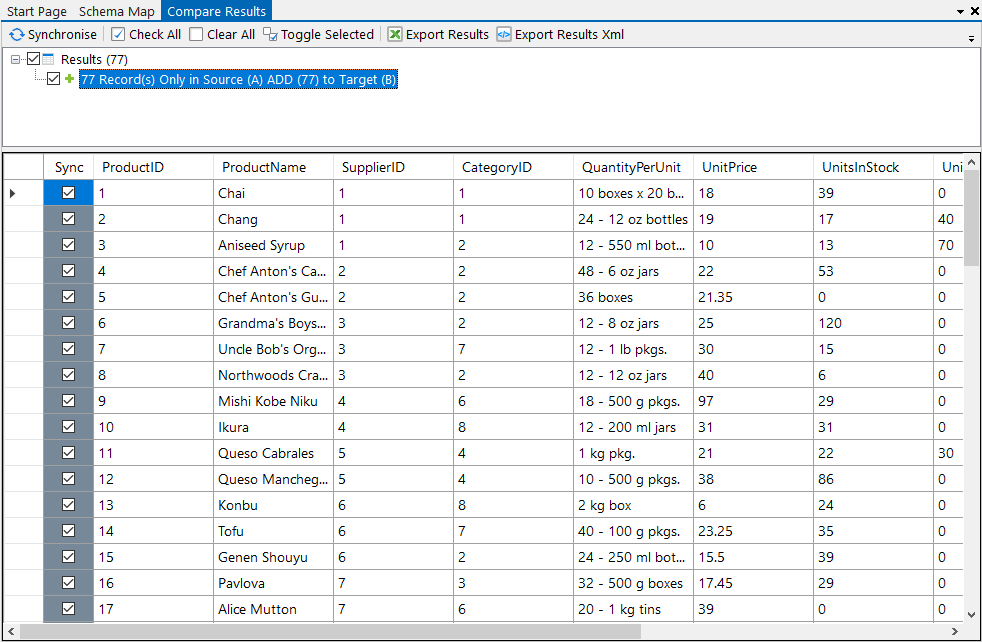
Once you are satisfied that the data is correct, click Synchronise and then Start to begin the sync. This will make your SharePoint list the same as your SQL table.
Make sure to save the project back to Ouvvi by clicking onto the Save button, and then navigate back to your Ouvvi site.

Configure the SQL to SharePoint Step
Once you are back in Ouvvi you need to add a second Data Sync step, this will be the project that will synchronise the data from SharePoint back to your SQL table.
To do this navigate to the main project, and go to Add Step > Data Sync Project Step. Enter in a name and click Save.

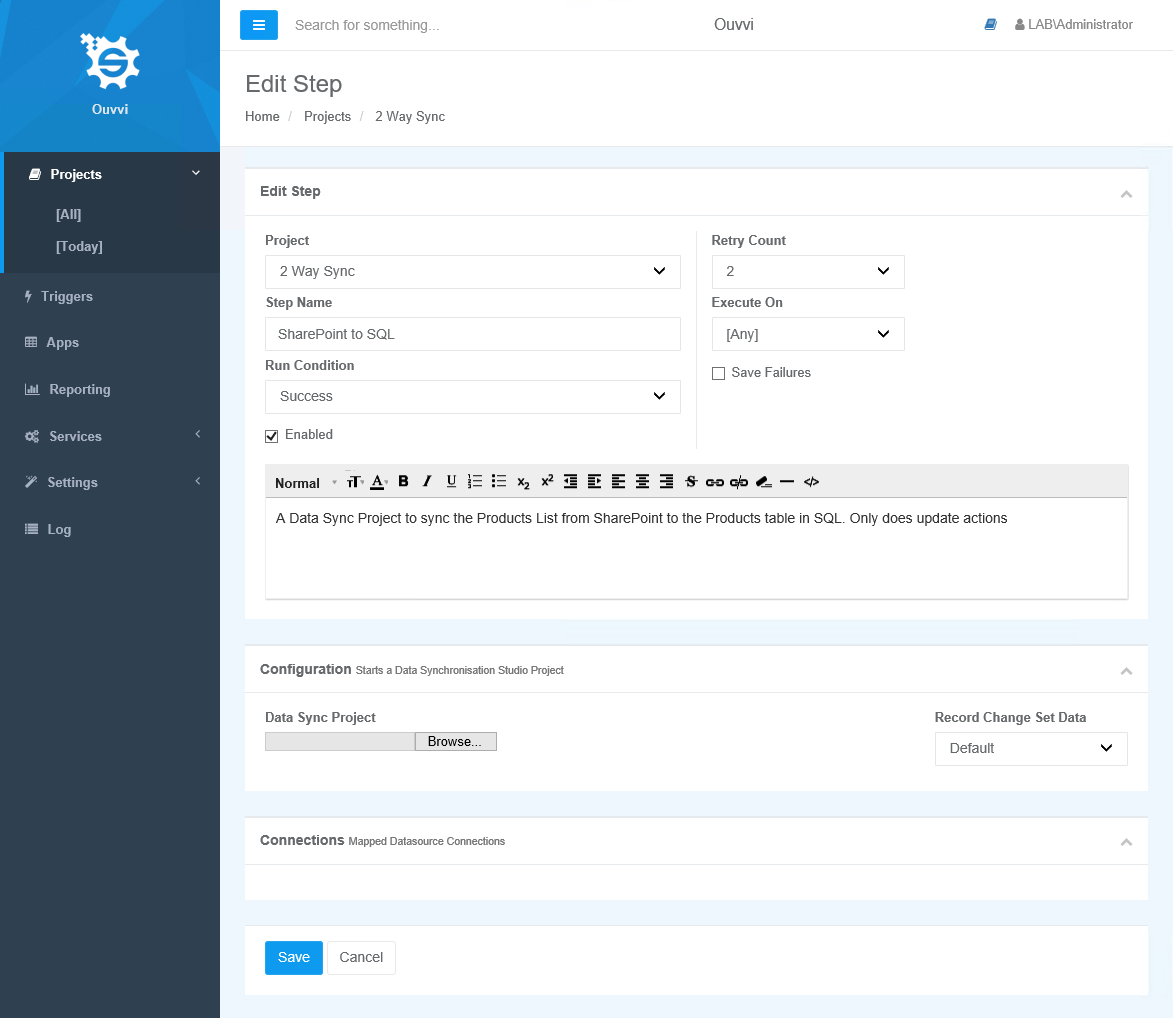
You then need to configure the project. Do this by opening Data Sync from Ouvvi by clicking onto the Open Project button.
Make sure to connect to your SharePoint list as the source and connect to your SQL table as the target.
Configure the Schema Map
Now add the columns you want to update into the schema map and map them to the corresponding target column in the SQL table.
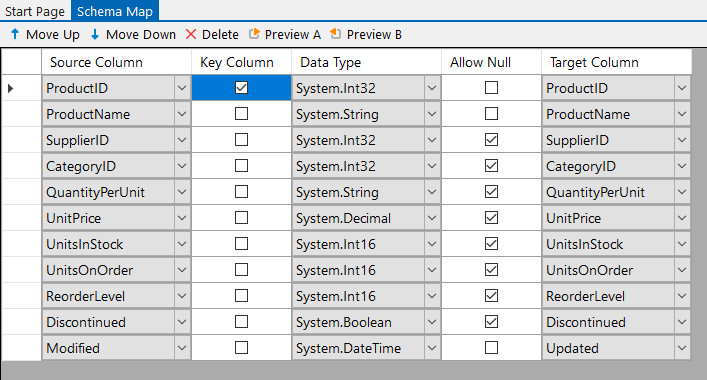
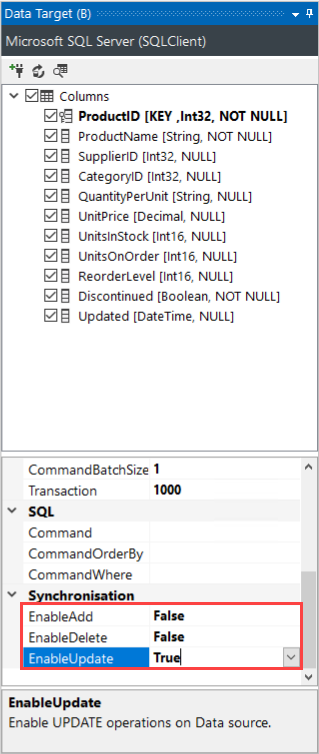
Be sure to select your key column, and set EnableAdd to False to prevent any additions and make sure that EnableDelete is set to False as well. As this is the secondary project we only want to update records in our SQL Table as the SQL Table is the main control. This is to prevent any accidental data additions and deletions.
Compare and Check the Data
Then run the compare by clicking onto the Compare A > B button and check that the data is presenting correctly.
As we ran the sync in the first project there may not be any changes to be made unless and edit has been made in the SharePoint List.
Once you are confident that the data is correct, save the project and go back to Ouvvi.
Configure the Trigger
You can now configure the project to run on a schedule using any of the triggers available in Ouvvi. One option is a time based trigger to run the project at a specific interval.
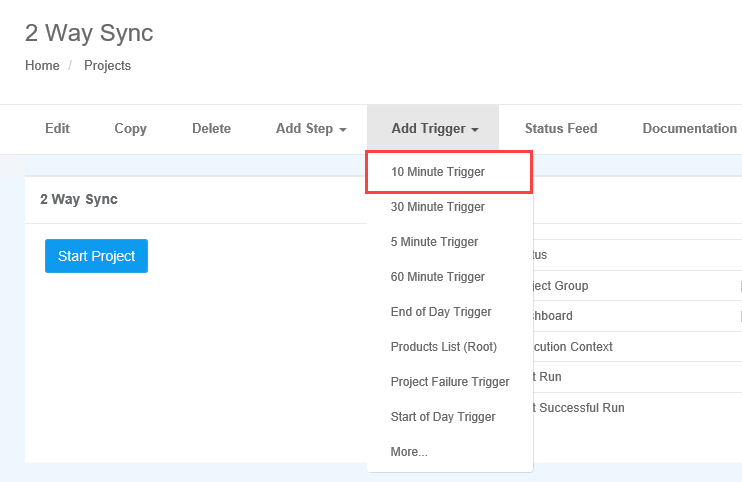
For example we can use the built in 10 minute trigger to run the project every 10 minutes, everyday between the start and end time hours defined in the main Ouvvi settings.
You can add this trigger by going to Add Trigger and selecting 10 Minute Trigger.
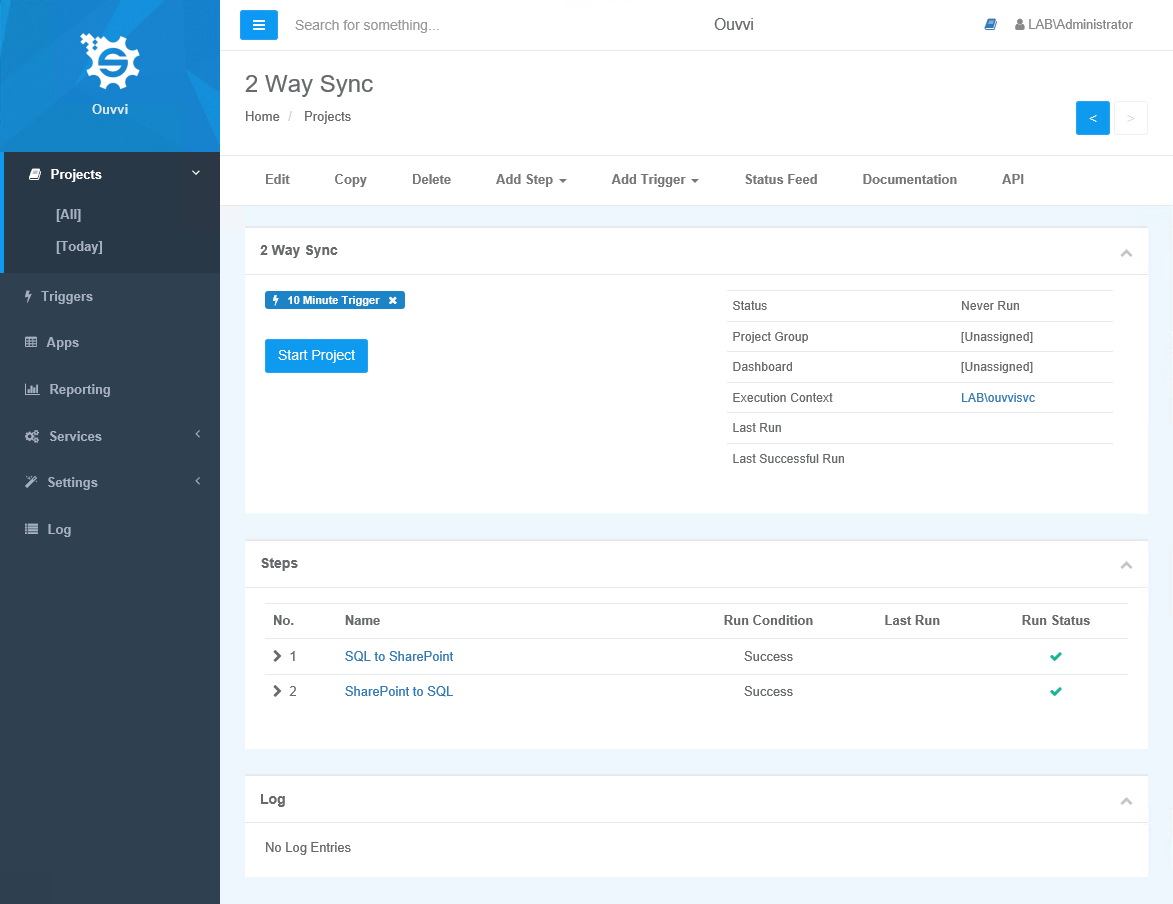
You can always edit this trigger or create your own to meet your requirements. Take a look at our documentation to learn more about the different trigger types.
Change Sets
Ouvvi has many useful features, and one of these is change sets.
Change sets allow us to see how many records were added and updated in each run of the project, and view the data that was changed. This is only available for Data Sync Steps and if you wish to preivew the changes that were made you will need to make sure that change sets are enabled.
For each Data Sync step you will be able to see the total data changes whether change sets are enabled or disabled. To view these totals you can click onto the log instance for that project run.
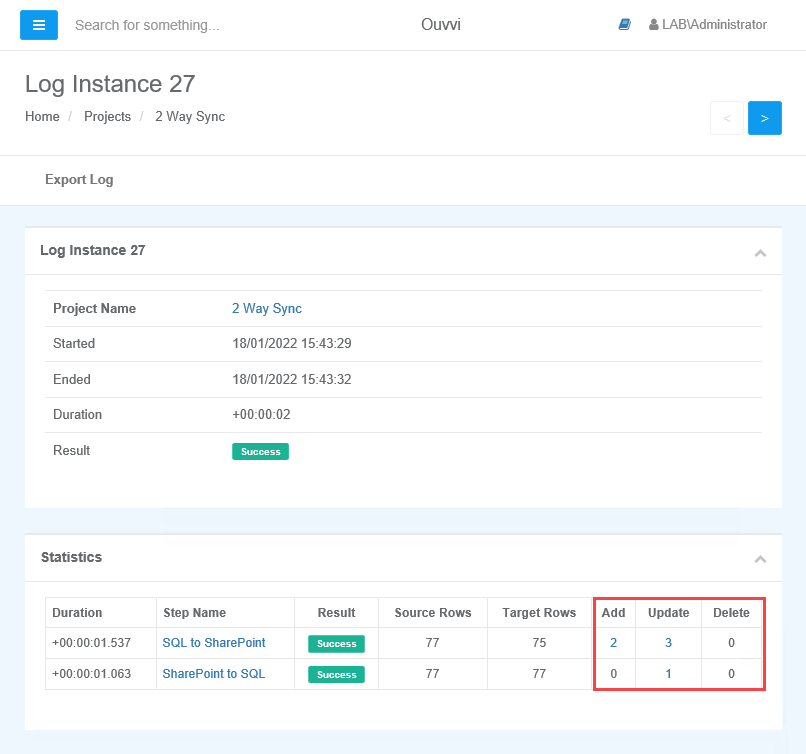
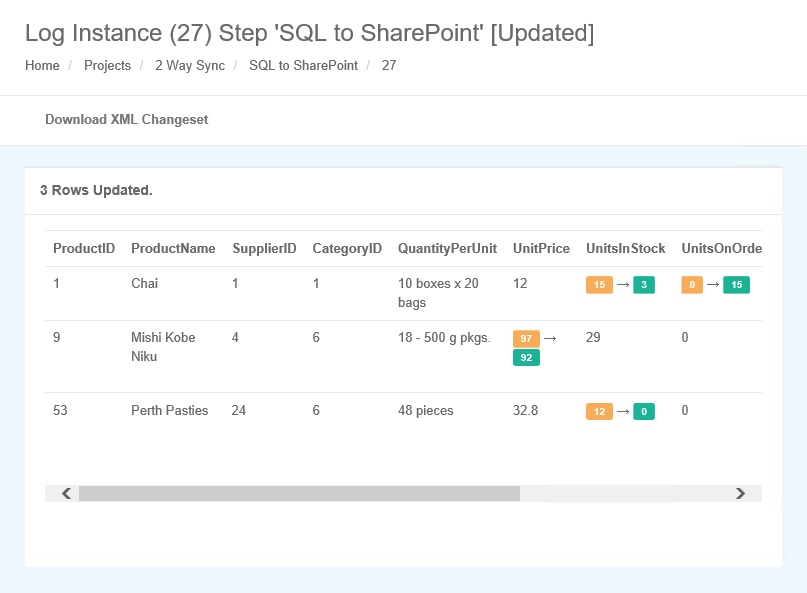
Then, if change sets are enabled, you can preview the data that has been added, updated or deleted (if deletes are enabled) by clicking onto the totals.
Here we can see the three updates that were made to the SharePoint list from the SQL table source on this run of the step.
Alternative method
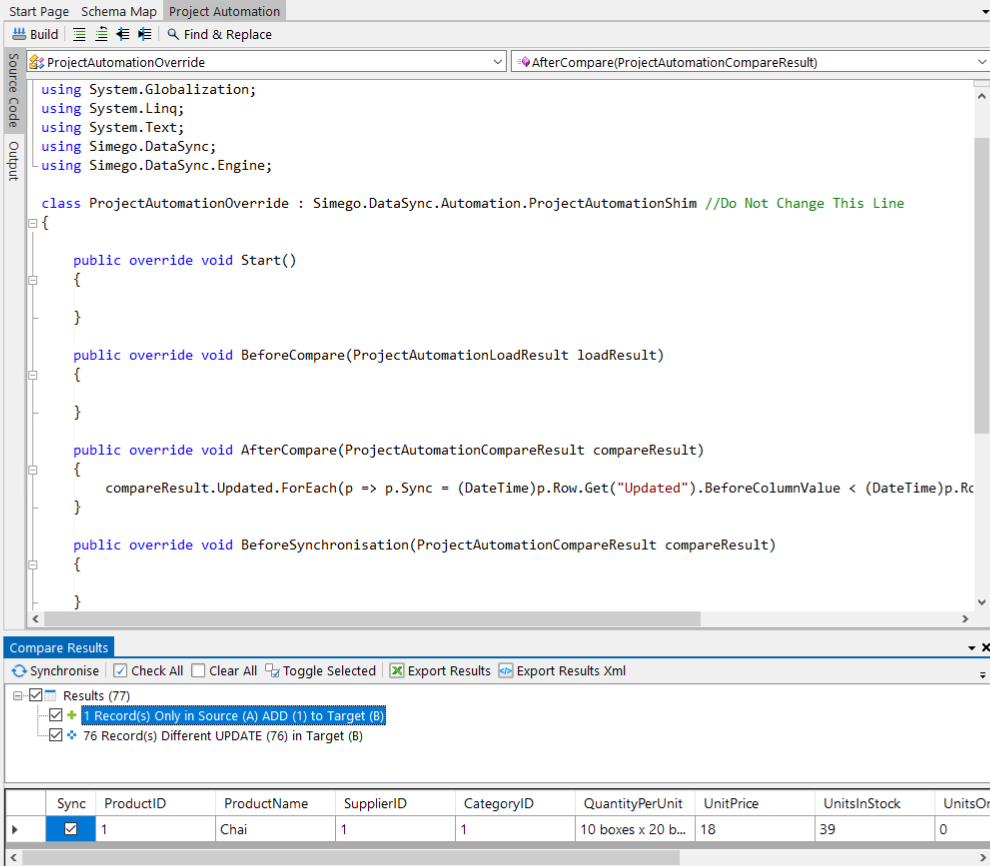
There is an alternative method to performing a two way sync without needing to change the schema properties. This uses Project Automation to check the updated column dates and set the sync flag at runtime if the source date is newer than the target date.
To do this connect to your SQL table and SharePoint List as normal and add the columns you want to sync to the schema map. Then go to View > Project Automation and enable the code editor.
Look for the AfterCompare method and enter in the following code. You may need to edit this if your column names are different.
public override void AfterCompare(ProjectAutomationCompareResult compareResult)
{
    compareResult.Updated.ForEach(
        p => p.Sync = (DateTime)p.Row.Get("Updated").BeforeColumnValue < (DateTime)p.Row.Get("Updated").AfterColumnValue
    );
}
Make sure to run the compare to ensure that only the records that are newer in the SQL table are added. Below you can see the code added to the Project Automation window and the results of the compare.
You can now save the project and configure this to run on the schedule you set.
