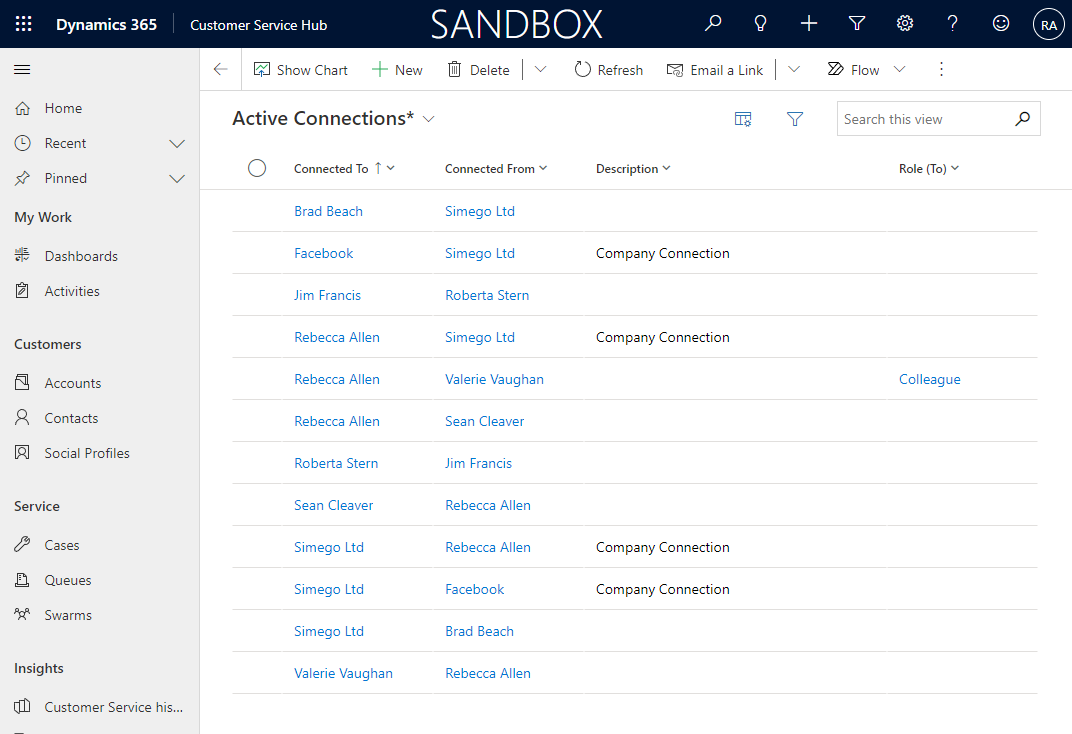
Importing Dynamics 365 Connection Records
Connections in Dynamics 365 (CRM) are relationships between records. You can quickly create a project to create connection data to your Dynamics 365 site using Data Synchronisation Studio.

Requirements
Before getting started you need to ensure you have the following:
- Windows 10 or Windows Server
- Downloaded & Installed Data Synchronisation Studio
- Access to Dynamics 365
- Configured your connection to Dynamics 365 in Data Sync
If you do not have Data Synchronisation Studio you can get a free evaluation edition.
Required Columns and Source Data Preview
You create connection records in a similar way to activity records. You need to start by connecting your source to the dataset containing your connection data and your target to the connection entity of Dynamics.
For connections you need to include the following columns:
- connectionid - the guid to identify each connection record
- record1id - the guid id of the record to link (Connected To)
- record1idobjecttypecode - the object type code of the record to link
- record2id - the guid id of the linking record (Connected From)
- record1idobjecttypecode- the object type code of the linking record
You can optionally add a description to describe the connection (e.g. "Company Connection") and a role if it is required using the record1roleid or record2roleid depending on which record you want to add the role to.
Below you can see a preview of the data we are using to add connection records to Dynamics.

In this data set we don't have the id's of the records being added so will need to lookup and return each of these. The next step will walk you through how to do this.
Lookup the Record IDs
It is likely that you won't know the record id for the records you are linking so you will need to create a lookup to find and return this value.
As we have a mixture of both contacts, users and accounts we will need to define a function using calculated columns as the data will be found in different entities depending on the type listed.
In the expression below we lookup the id of the record in the corresponding entity using the name returned in the source column Record1. The entity to be looked up in is determined by the value returned in the ObjectTypeCode column in the source dataset.
CASE(ObjectType1, NULL(),
KV("contact", LOOKUPB("contactid", "contact", WHEN("fullname", Record1))),
KV("account", LOOKUPB("accountid", "account", WHEN("name", Record1))),
KV("systemuser", LOOKUPB("systemuserid", "systemuser", WHEN("fullname", Record1))))
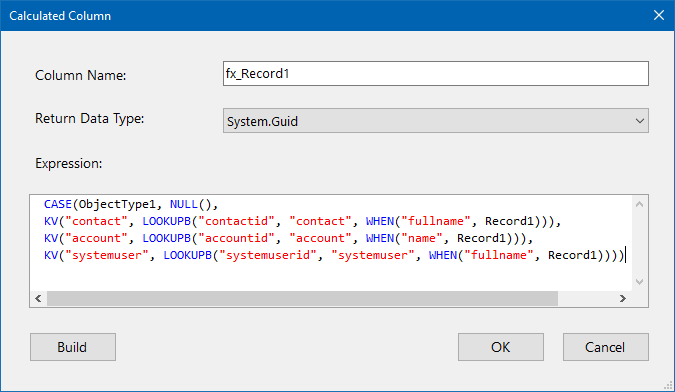
You can add additional parameters to the CASE function as you need to, just make sure to configure the lookup to use the correct target column. The statement returns null as a default value if the object type doesn't exist.
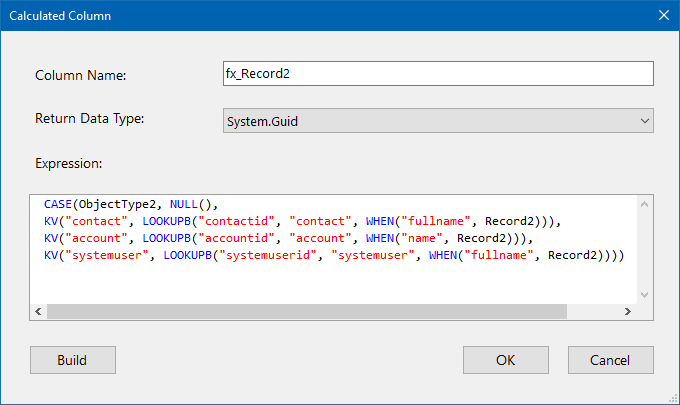
You need to repeat this for the Record2/ObjectType2 to return the correct record id, you can use the same expression as above just change the columns being called from the source.
Configure the Schema Map
When you add the columns to the schema map you need to define a key column or composite key columns that can be used to uniquely identify each connection. For this example we use the connection id but you could use a composite key of the record id of both items being linked, record1id and record2id.
Your schema map should then look something like this:

Filter for Main Connection Records
When you synchronise the results Dynamics will automatically create the reverse connection. This causes a problem for Data Sync as it will show as an extra record on the next sync.
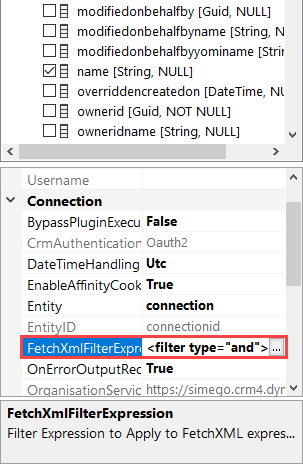
To get around this we need to filter out the reverse connection by using a Fetch XML Filter Expression and just select the rows where ismaster is true.
You can add the filter by clicking on the ellipsis in the FetchXmlFilterExpression field in the connection properties on the target and then entering the expression defined below.
<filter type="and">
   <condition attribute="ismaster" operator="eq" value="1" />
</filter>
Compare and Sync
To finish click Compare A > B in the toolbar which will open the results tab. Here you can preview the changes to be made, in this example it shows us as having 4 additions and 2 deletes.
The deletes are disabled by default so will not be included but show because these two records do not exist in the source dataset. To enable deletes please set EnableDelete to True in the target connection properties.
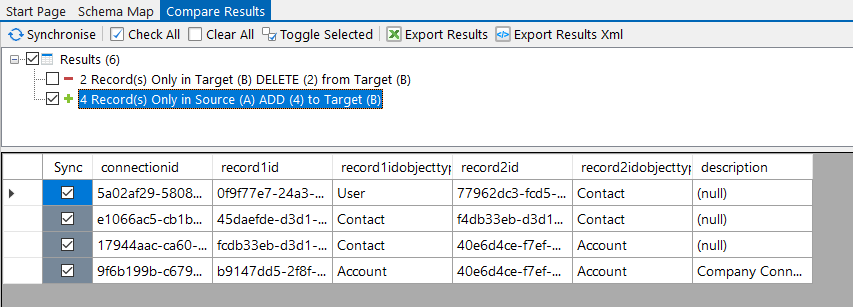
To add the records to Dynamics click Synchronise and then Start to begin the sync. The connection records are then added and visible in Dynamics.
