Importing Documents as Attachments in Dynamics 365
Data Sync has many uses and if you are already integrating with Dynamics 365 (CRM) then you can quickly import documents as attachments into your Dynamics environment in a few steps.
The following page will show you an example of how you can import files from your file systems into the attachments entity in Dynamics and link these to a corresponding account.

Requirements
Before getting started you need to ensure you have the following:
- Windows 10 or Windows Server
- Downloaded & Installed Data Synchronisation Studio
- Access to Dynamics 365
- Configured your connection to Dynamics 365 in Data Sync
If you do not have Data Synchronisation Studio you can get a free evaluation edition.
Connect to your Source Data
The following example is using the file explorer as the source and assumes you have your files arranged into folders. Where the folder name is the name of the account that you want to link the file to.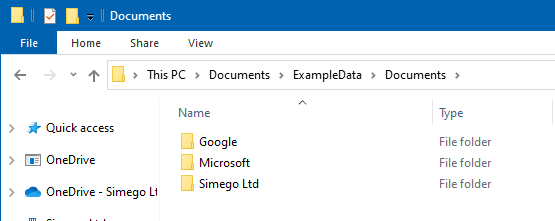
To get started you need to open Data Sync and connect your source to your file system. To do this open the connection window and go to File System > Files, then click onto the ellipsis in the path field to browse for your folders.
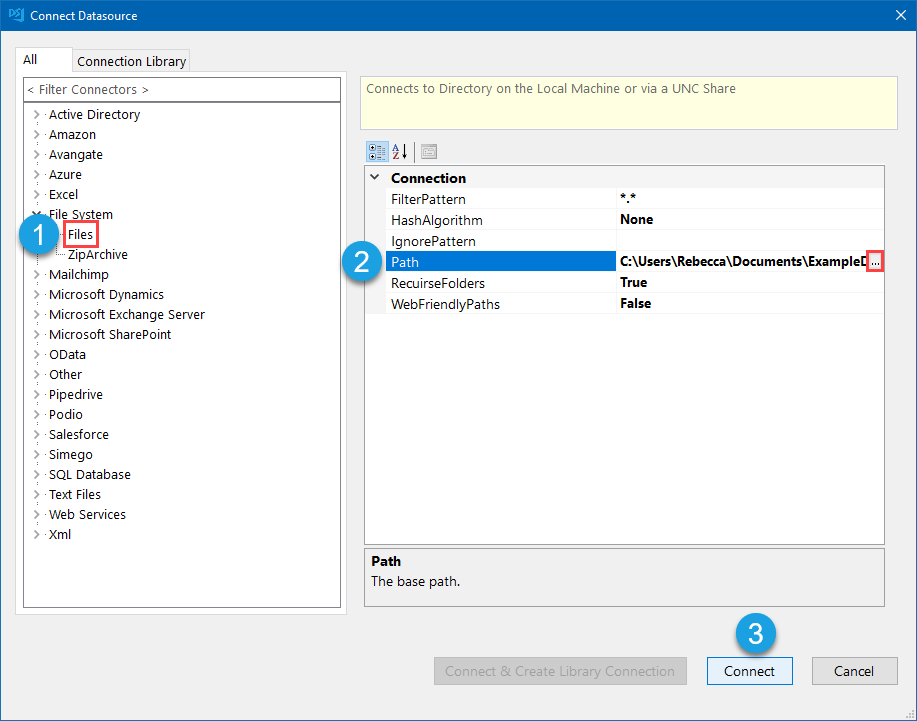
Then click Connect to add the connection.
Create the Metadata Columns
In order to pass the file data to Dynamics this needs to be in the format of a Base64 encoded string. With Data Sync this can be converted using calculated columns and a simple expression.
Don't forget to escape the backslashes in the path otherwise your expression will not work
TOBASE64(System.IO.File.ReadAllBytes("C:\\Users\\Rebecca\\Documents\\ExampleData\\Documents\\" + FullFileName))
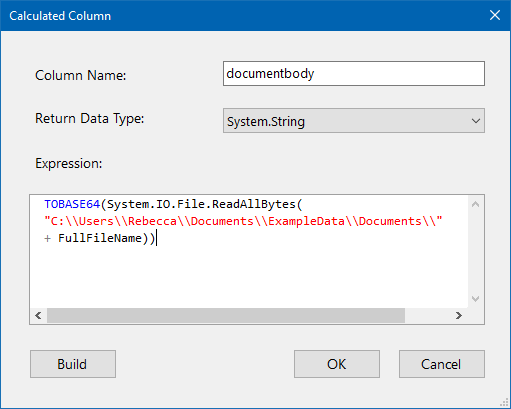
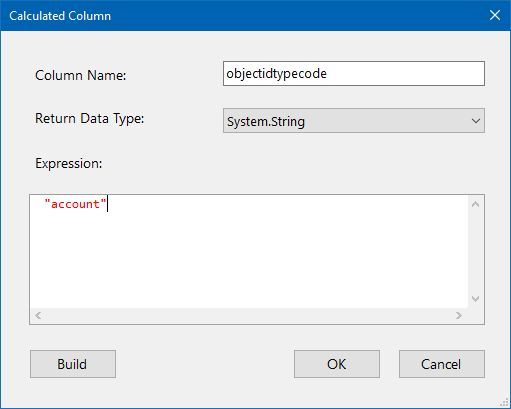
We also need to include an Object ID Type Code of account, as we will be returning the id of the account objects that are specified in the path to link the documents to each account. This can be done with another calculated column where we just return the string account.
Connect your target to Dynamics
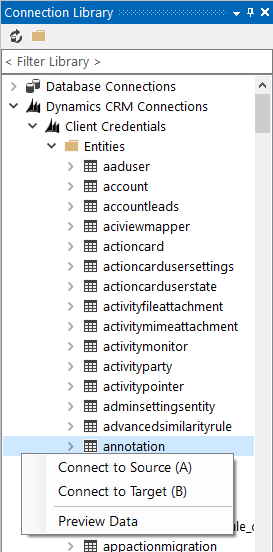
Next you need to connect your target to the annotation entity of your Dynamics site. As you have already pre-configured your connection and saved this to the connection library you can simply expand your connection and right click on the annotation entity and select Connect to Target (B).
Lookup Account
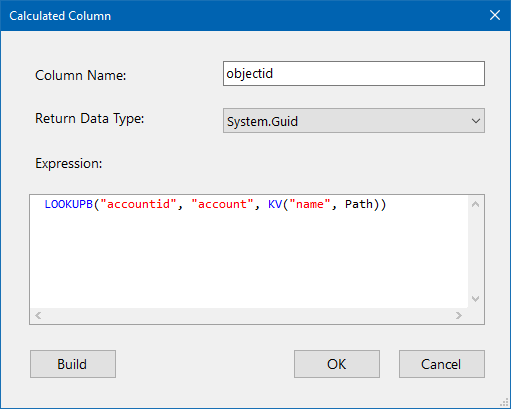
You then need to lookup the account name in the account entity of Dynamics using calculated columns. The expression we use for this is:
LOOKUPB("accountid", "account", KV("name", Path))
This will lookup the account id in the account entity when the account name matches the folder name in the path.
Configure the Schema Map
Now add the columns to the schema map and map them to their corresponding column in Dynamics. Make sure to set the composite key columns so that the records will return as unique. In this example we use FileName and the lookup column objectid.
The schema map should then look similar to:

Compare and Sync
Now run the compare by clicking onto the Compare A>B button in the toolbar and preview the results.
As we are adding documents we can see that we have X many documents to add to Dynamics by clicking onto the add item in the results list. If we were updating an existing attachment document then this would show in the update item.
Please note that deletes are disabled by default but will still show in the results if the record is not present in the source system.
To enable deletes please set EnableDeletes to True in the target connection properties.
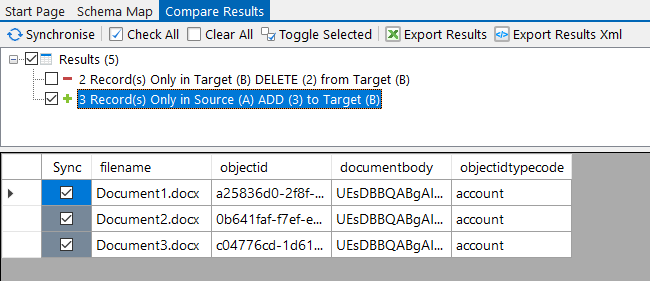
If the data is presenting as expected then you can synchronise the results. To do this click Synchronise and then Start to begin the sync.
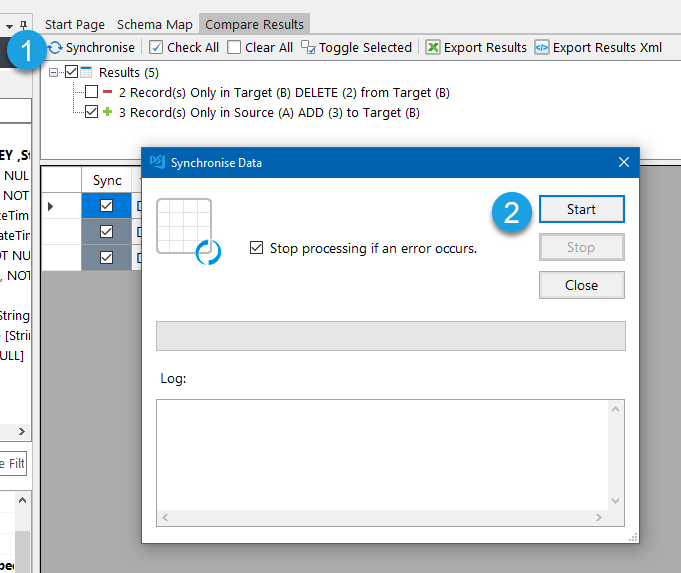
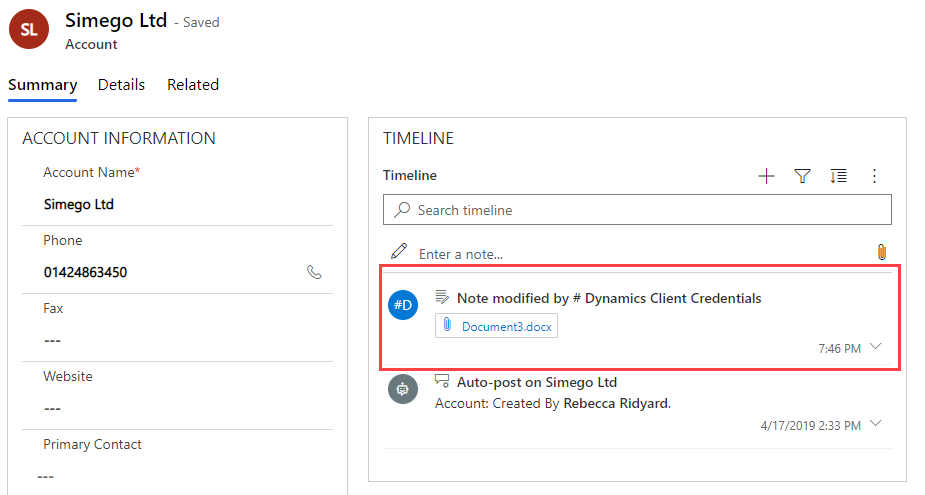
Your documents will now be added to Dynamics as attachments to each account specified.
If you want more ideas on how you can integrate with Dynamics take a look at our other blog posts. As always if you have any questions please send an email to support@simego.com and we will be happy to help.