Bulk Update Active Directory
You can use Data Sync to apply large updates or additions to your Active Directory records with a few easy steps.
You may need to change the enabled or disabled status of a large quantity of users, or you might have added a new metadata column for all users stored within a SharePoint list and this needs to be applied to each Active Directory record. With Data Sync you simple connect, map, compare and sync, and your changes will be applied.
Below we discuss setting up a project to add 800+ new users, and update 160 records with an additional column of data and an account status change.
Requirements
Before you get started there are a few requirements:- Windows 10 or Windows Server
- Downloaded & Installed Data Synchronisation Studio
- Access to Active Directory
- A data set containing the records you want to add
If you do not have Data Synchronisation Studio you can get a free evaluation edition here.
Connect to your Source and Target
To get started open Data Sync and connect to your source data, you can connect using any of the inbuilt connectors or build your own.
Then connect the target window to Active Directory. The default attribute to select in the connection will depend on the data you want to add. In this example we are adding to user records but you can change this as you need to and each type will follow the same process.
To connect to the user records in Active Directory we need to click onto Connect Datasource in the target window and go to Active Directory > Active Directory V2 - Users/Contacts/Groups/Computers.
By default Users will be selected from the DefaultAttributes drop-down menu, enter in the LDAP path to your Active Directory instance, and enter in any credentials you need to access AD.
You can enter in the full LDAP path (including the server name) or just the server name.
If you just use the server name your path would look similar to: LDAP://dc01.
Otherwise an example path connecting to a specific OU could be: LDAP://dc01/OU=Test,DC=demo,DC=simego,DC=com.
We have more details on finding the LDAP Path in our documentation.
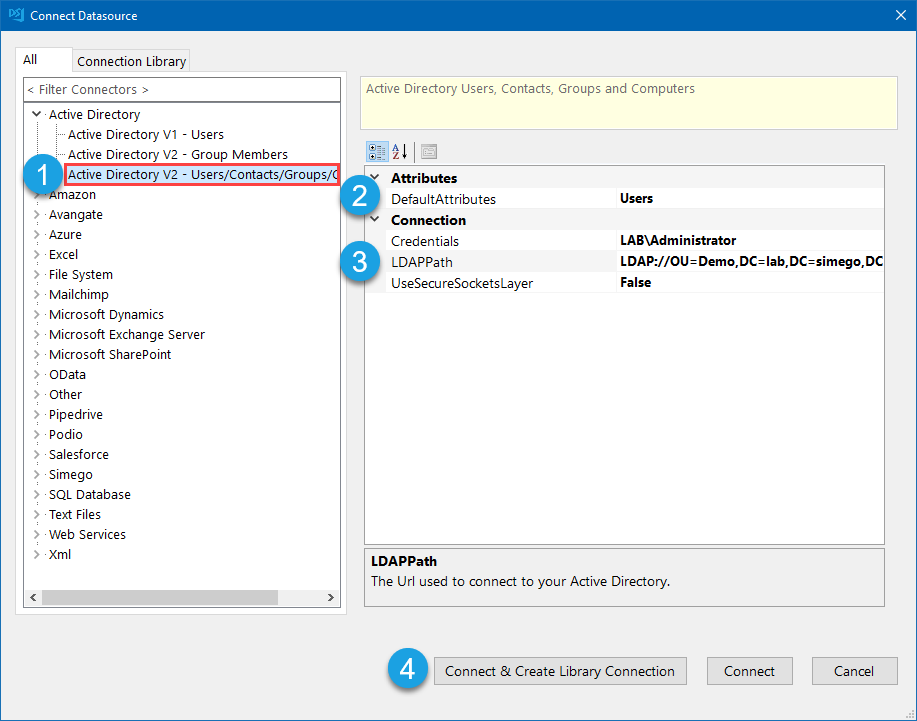
Then click Connect & Create Library Connection to save the connection to the connection library. Just enter in a name for the connection and click OK. Then refresh the connection window and your Active Directory connection will be visible in the list.
This only needs to be done once per OU as you will be able to access other objects such as Groups and Contacts from the connection window.
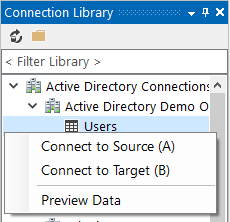
If you have already saved your connection to AD you can select the Users object from your AD connection. To do this right click onto Users object and select Connect to Target (B) or drag the object onto the target window.
Mapping
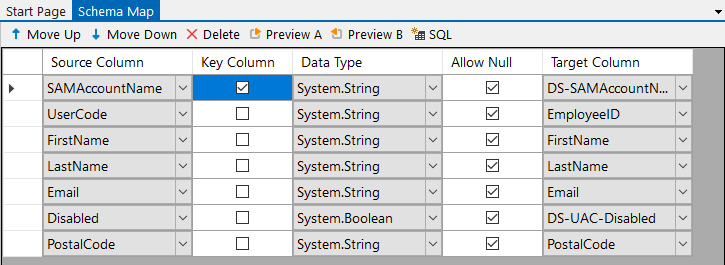
The next step is to map the columns you want to update and make sure to add a key column that can be used to identify each user. For users we recommend using either the SAMAccountName or the Email Address as these will always be unique.
Add the source columns to the schema map and match them to their corresponding Active Directory attribute.
Preview the Results and Sync
Now we need to run the compare to preview the results before synchronising. To do this click onto the Compare A > B button in the toolbar, and then select a row to view either the adds, updates or deletes.
NB. Deletes are disabled by default but will still show in the results if the records do not exist in the source data set. To enable deletes set EnableDelete to True in the target connection properties.
In this example we have 840 records to add to the target and 160 records to update. Below you can see that the update actions are highlighted in yellow.
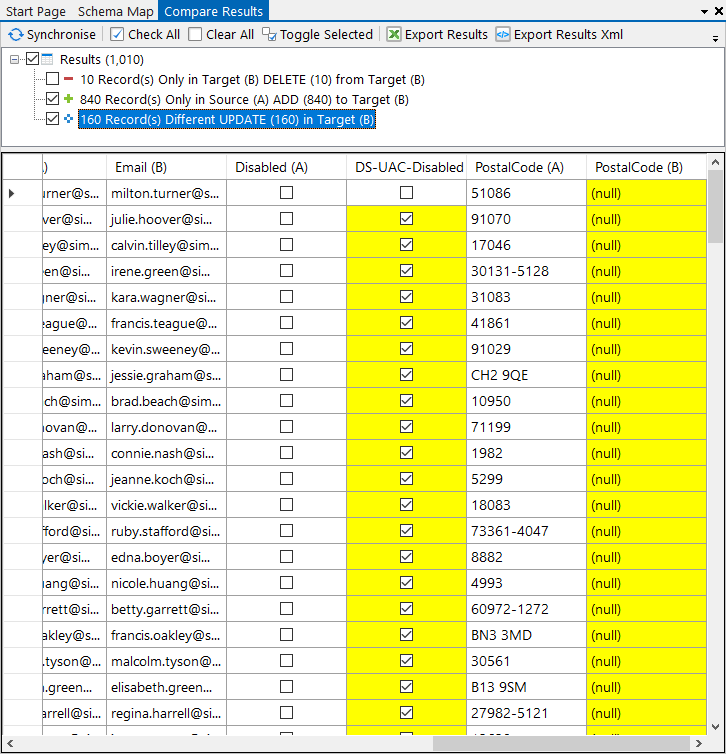
Make sure to take a quick glance through to ensure the data looks right and then click Synchronise and Start to begin the sync.
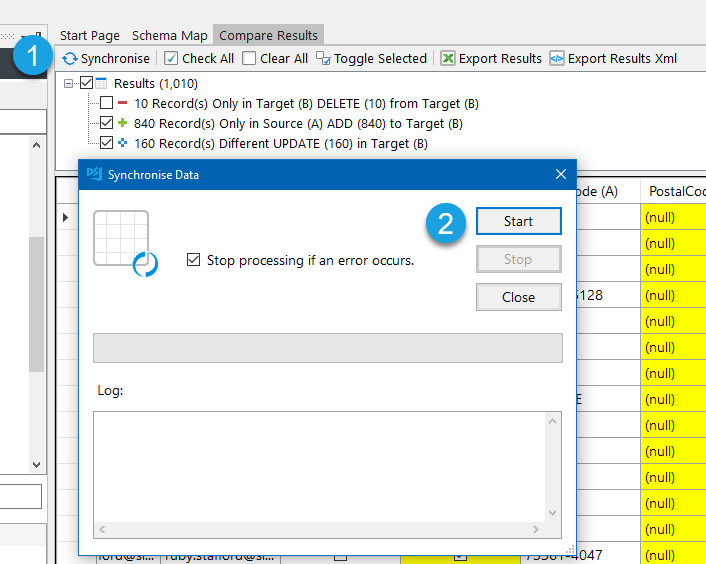
Your Active Directory records will then be added and updated where necessary.
Make sure to save your project in-case you need to use it again in the future. You can always modify it to include more columns.
