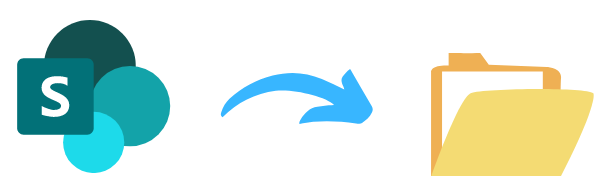
Synchronise a SharePoint Folder with the File System
In this guide we show a method to use Simego Data Synchronisation Studio to copy files from a SharePoint Document Library to a Local Folder. Data Sync will automatically detect which files have changed in SharePoint and copy them to the local folder so that the Directory Structure matches SharePoint.
Contents
- Begin Setup
- Connect Source to SharePoint Document Library
- Connect Target to Local Folder
- Map Source to Target
- Compare & Synchronise
- Schedule with Windows Task Scheduler
- Additional Configuration
Begin Setup
Before you start you will need the following:
- Windows 10 or Windows Server 2016-2019
- Simego Data Synchronisation Studio
- SharePoint Document Library on SharePoint Online
- Local Folder
If you do not have Data Synchronisation Studio you can get a free evaluation edition.
Connect Source to SharePoint Document Library
Data Sync can connect to SharePoint Online or an OnPremise SharePoint Document Library. The following details are for a connection to SharePoint Online.
For SharePoint Online you can connect either with Modern Authentication (Oauth2) or your Azure AD credentials if your organization still supports it.
FYI: In the future the only connection method for SharePoint Online will be OAuth2. Microsoft is disabling other authentication methods throughout 2022.
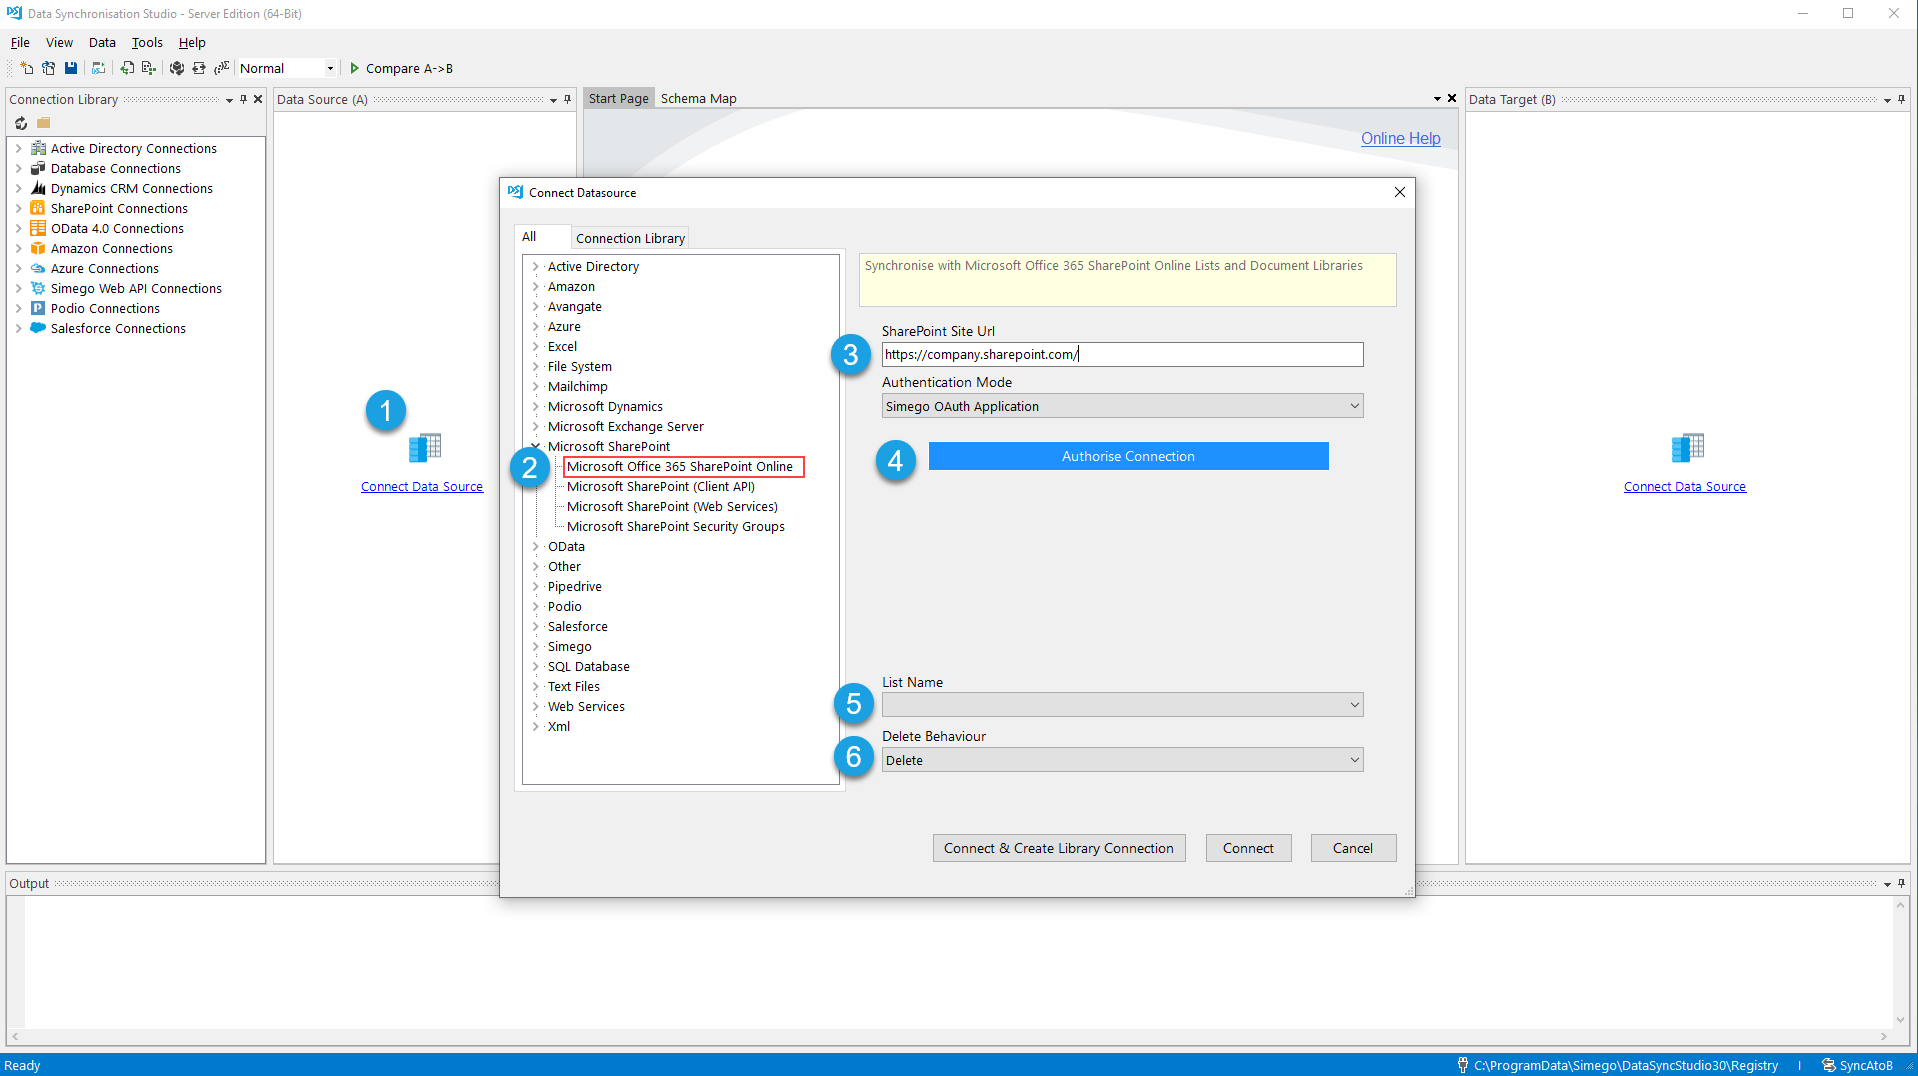
In Data Sync click the Connect DataSource icon on the source to open the Datasource connection window. Then choose the SharePoint Online connector under the Microsoft SharePoint category.
Enter the URL to your SharePoint Site this the URL to the root of your site. Examples of the URL are listed below.
https://company.sharepoint.com/https://company.sharepoint.com/subsitehttps://company.sharepoint.com/subsite/subsite2
Choose the Authentication Method to connect to your SharePoint Site. Choosing the default Simego OAuth Application will use a pre-registered multi-tenant Azure AD Oauth2 Application to connect to your SharePoint Online instance.
You can learn more about supported authentication methods in our documentation. Click the Authorize Connection button, this will open your default browser and ask you to sign in to Azure AD and grant access to allow Data Sync to connect to your SharePoint instance.
Once the Authorization is complete go back to Data Sync and choose your SharePoint Document Library from the List and click Connect & Create Library Connection.
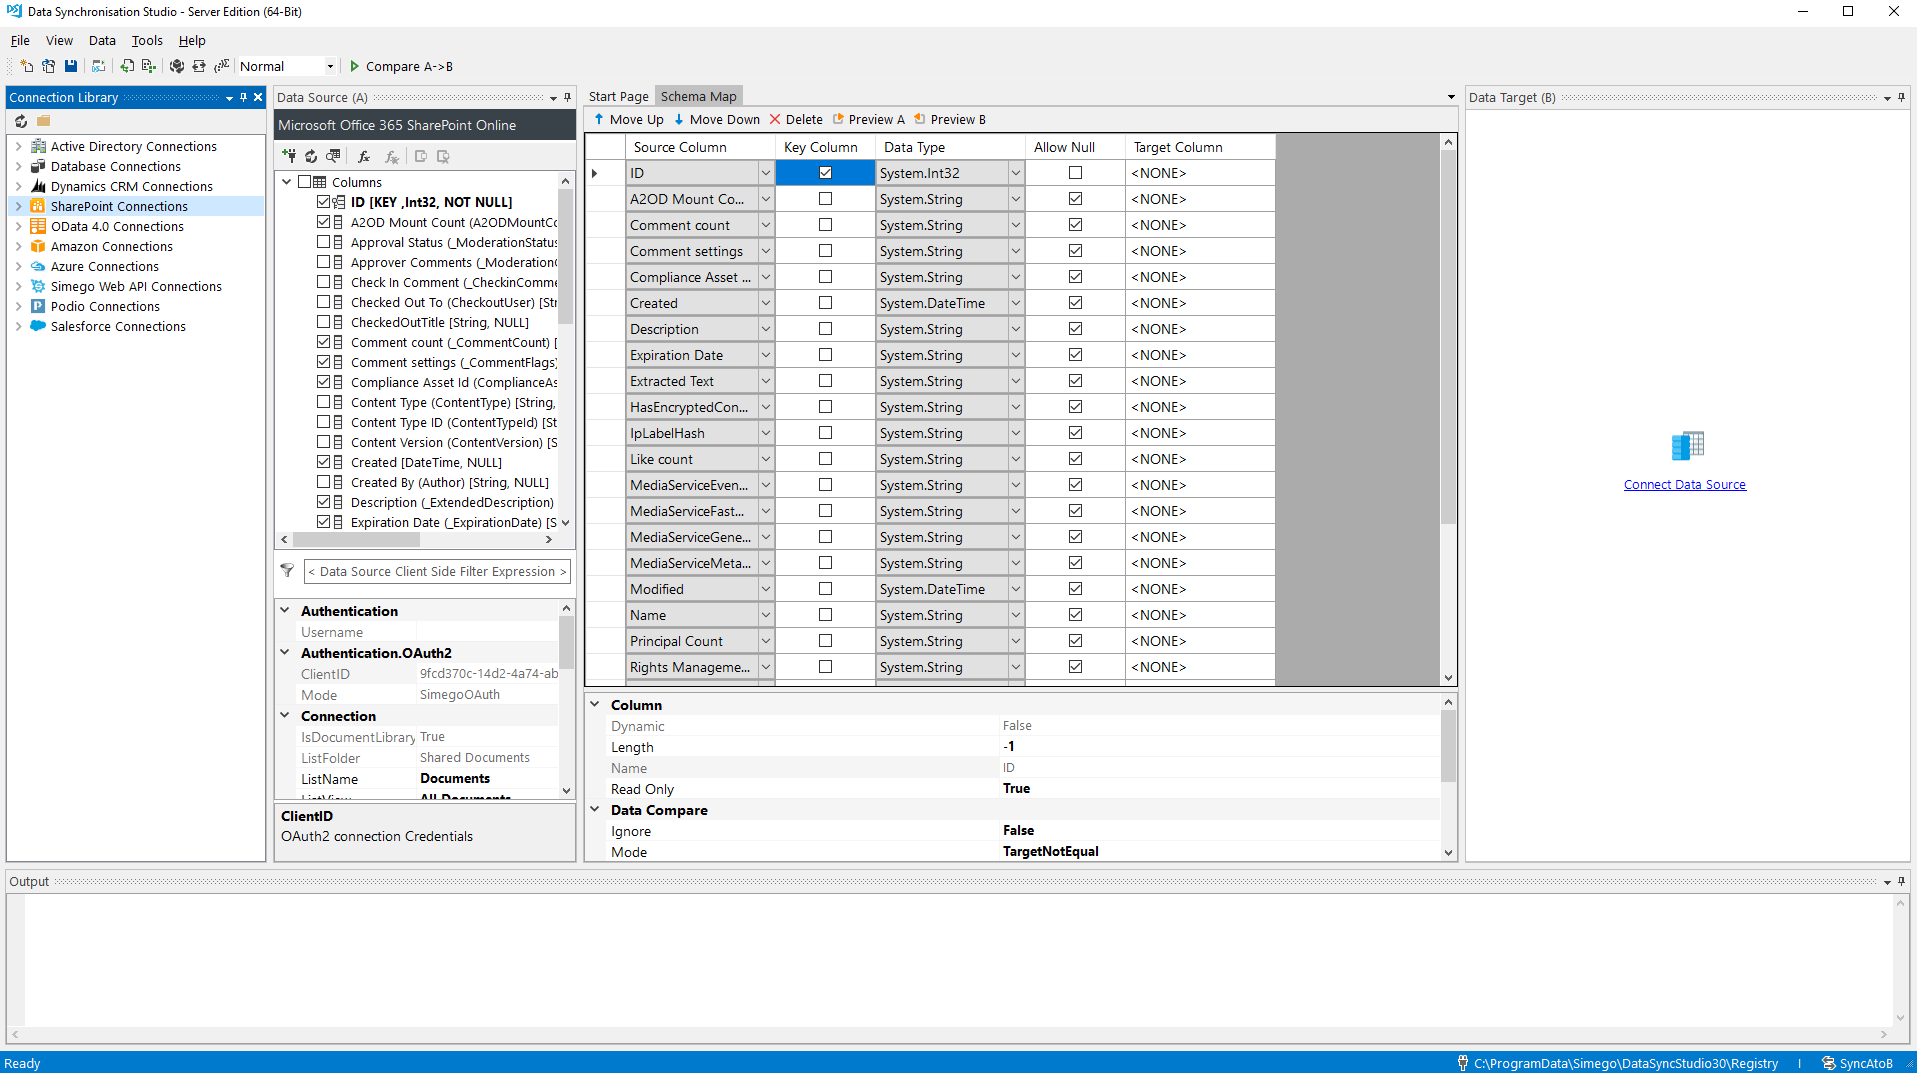
Once your connected to the SharePoint Document Library, Data Sync will load the library data schema into the source connection and create a default schema map.
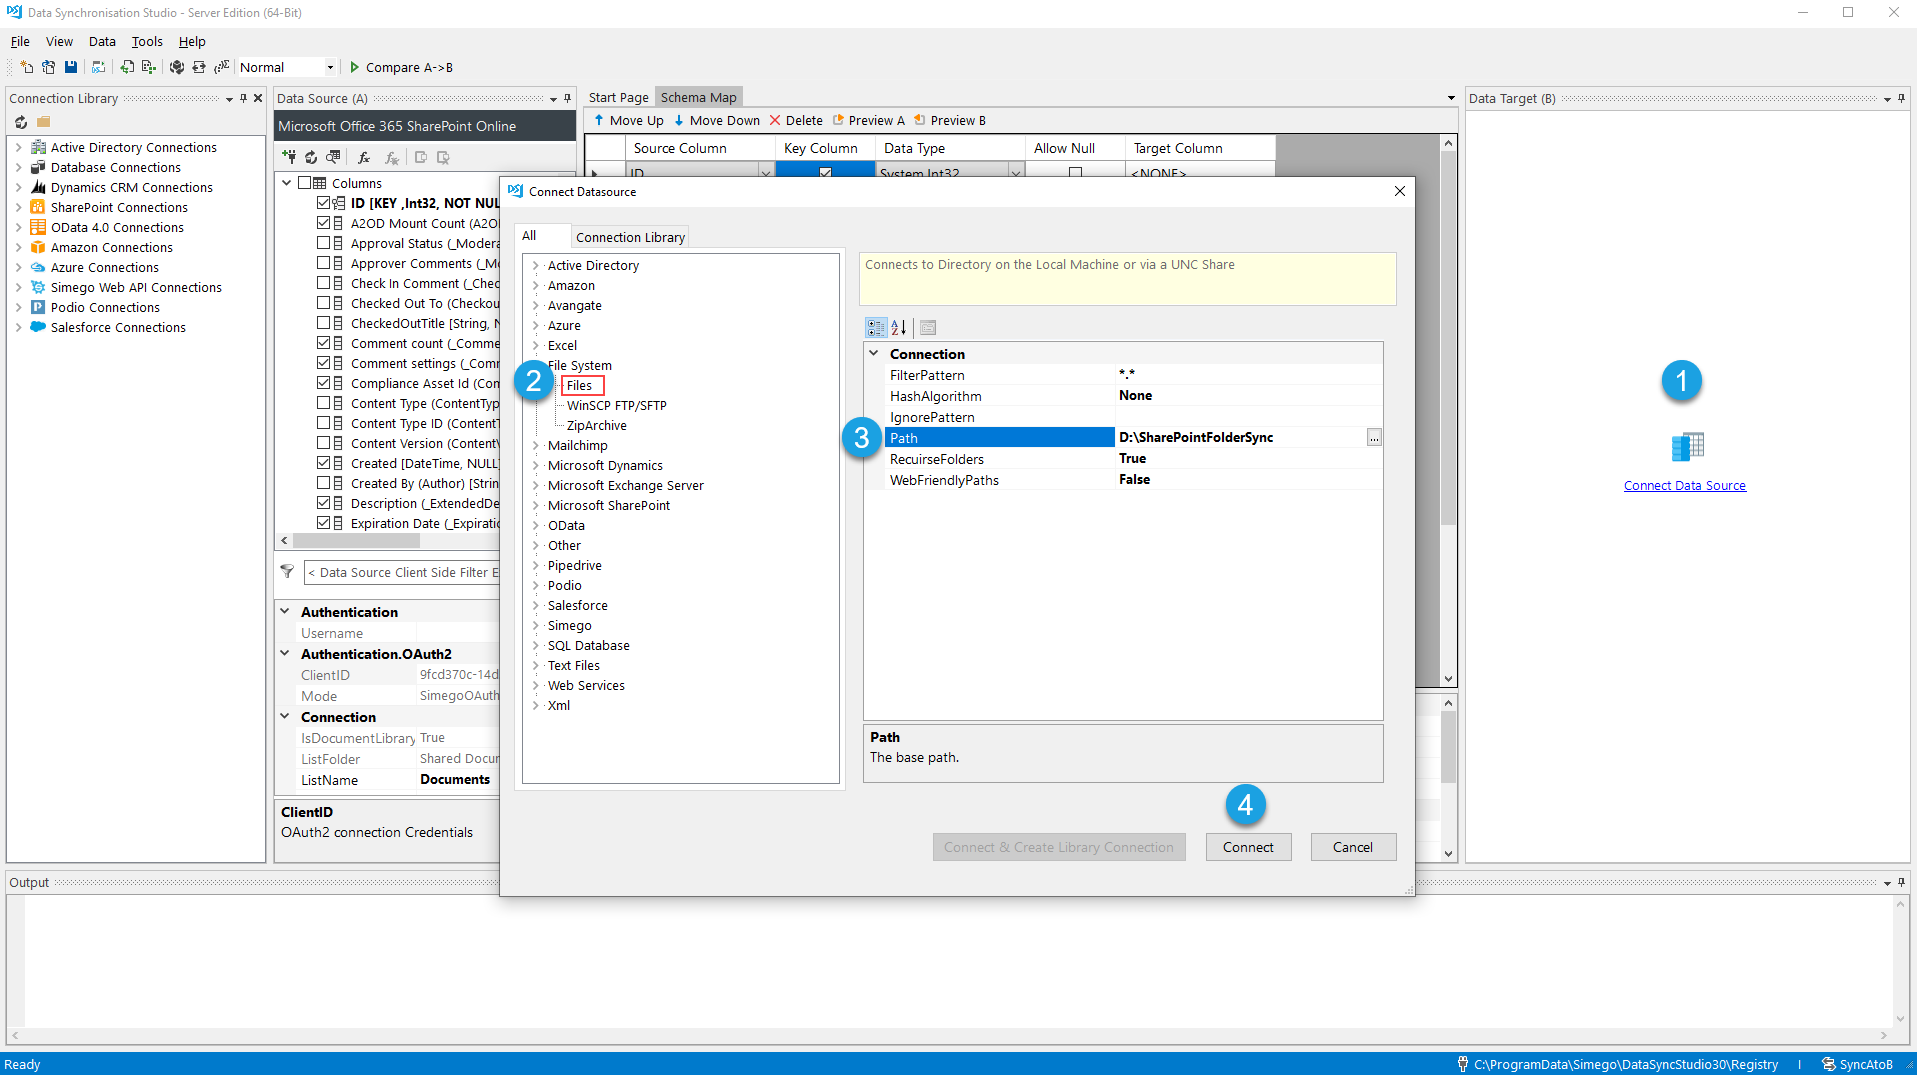
Connect Target to Local Folder
The next step is to connect the target to the local folder where you want your SharePoint documents copied to. This is the folder which Data Sync will keep synchronised with the SharePoint Document Library.
This is a 1-Way sync where document changes in SharePoint are copied to the folder. The timestamp of the change in SharePoint is also applied to the local file when it is copied so that they remain the same.
Map Source to Target
The schema map defines the mapping of the source to the target. For this SharePoint to Folder synchronisation we simply want to map the filename to the target along with the Created and Modified dates.
Data Sync includes a default mapping rule for this type of project so that the mapping can be created automatically for you. When the mapping rules dialog is displayed select the SharePoint Document Library to Folder mapping rule and click Apply.
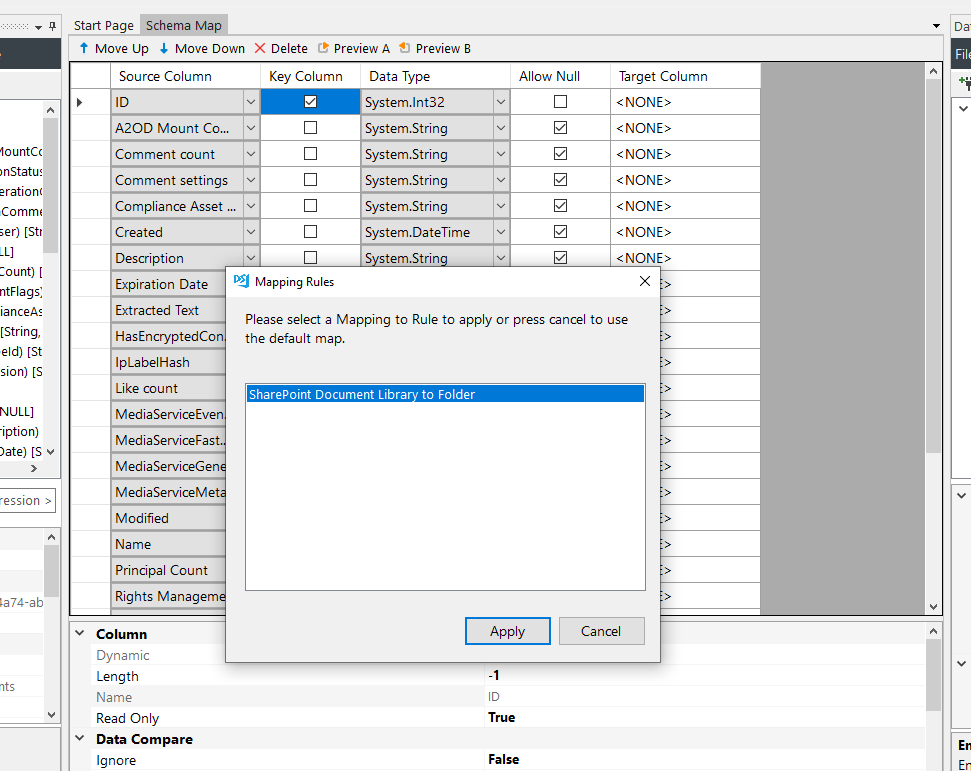
The schema map should then be shown like this mapping URL Path from SharePoint to FullFileName on the target.
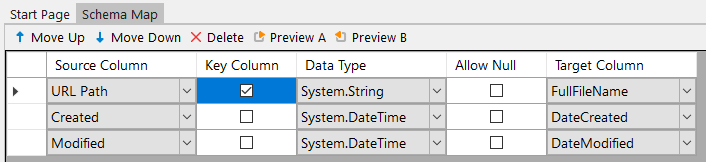
The mapping rule also sets WebFriendlyPaths to true on the target connection so that the local file paths use a forward slash (/) rather than a backslash (\).
Compare & Synchronise
Next we use Data Sync to load the list of Documents stored in SharePoint and in the Folder and compare these to work out which documents need to be ADDED, UPDATED or DELETED so that the local folder matches SharePoint.
FYI: Delete operations are always disabled by default on new Data Sync projects to enable Delete you need to set the EnableDelete property in the target connection to true.
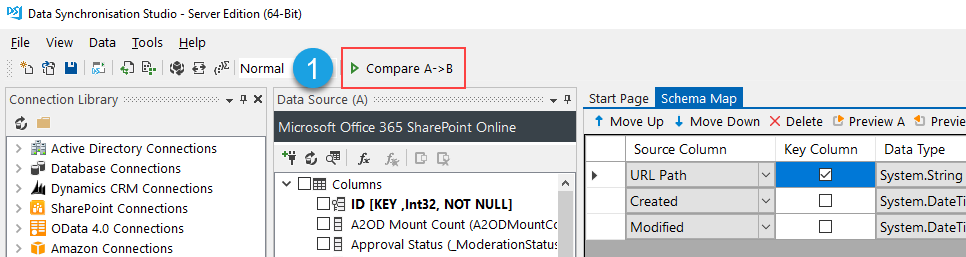
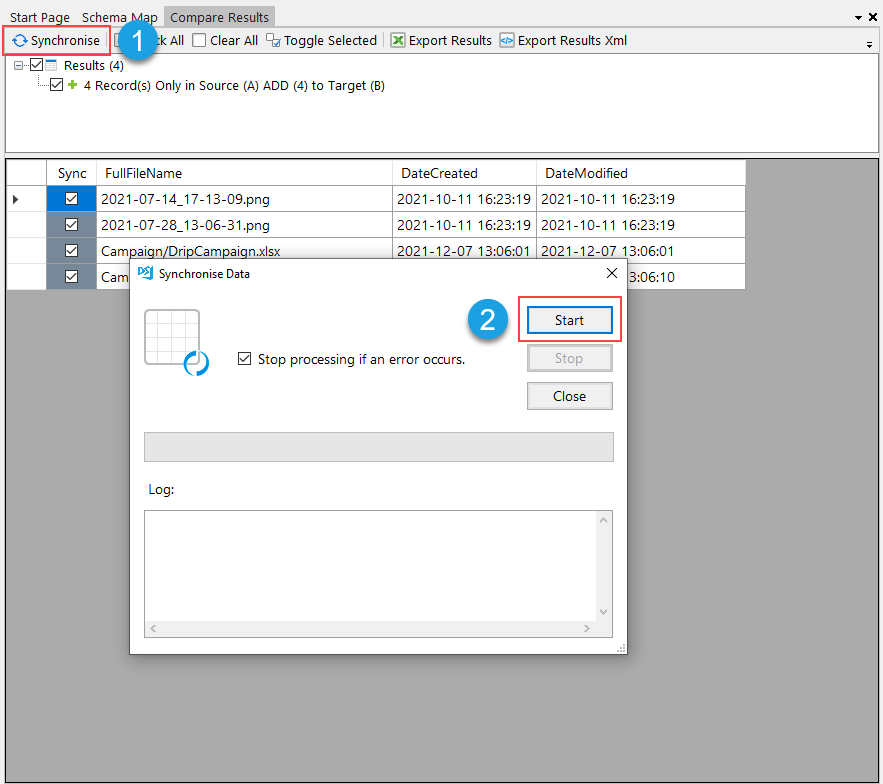
To start the synchronisation process click the Compare A->B button on the main toolbar. This will start the process to load the file list from SharePoint and the local folder. At this point only the data is loaded and compared to create the changeset, no files would have been written at this point.
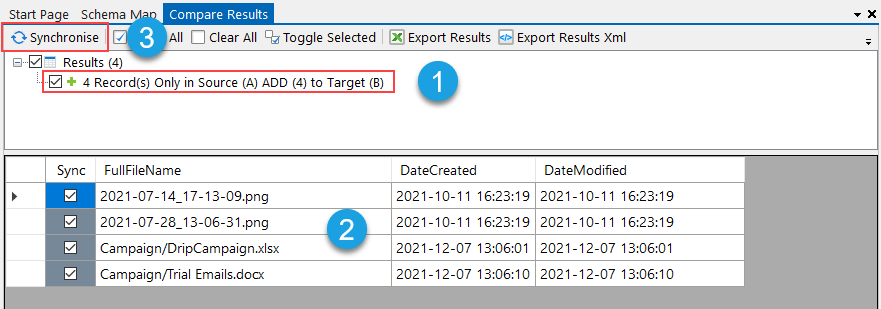
We can now review the changes that are to be made before running the copy operation to copy the files from SharePoint to the local folder.
Clicking on the 4 Record(s) Only in Source (A) ADD (4) to Target (B) row in the changeset shows us the file list to be ADDED to the folder. We can the review this and once we happy to continue click the Synchronise button to start the copy process.
Click the Start button to start the actual synchronisation.
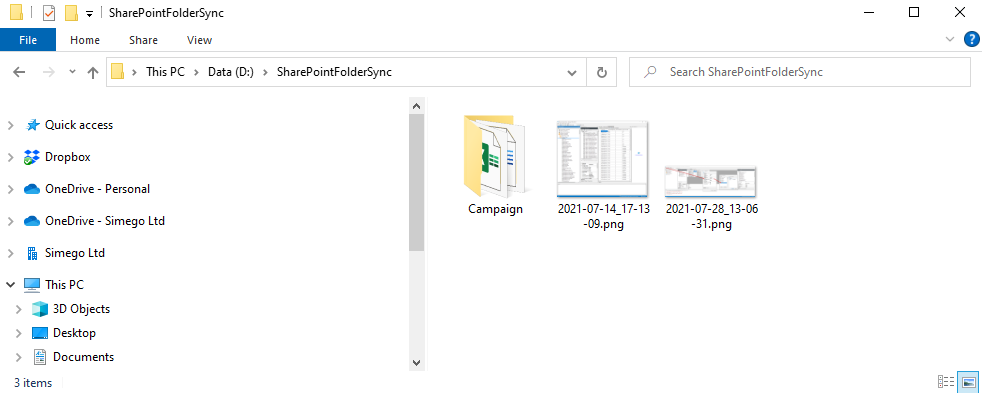
This completes the synchronisation, if you then look in the target folder you will see that your files have been copied. Any folders in SharePoint have also been created in the local filesystem.
You can then go and add additional documents to SharePoint or edit existing documents. When you then compare and synchronise again you will see that only those documents which were changed in SharePoint are copied.
Schedule with Windows Task Scheduler
Now that your project is configured you can save it and then schedule it to run via the Data Sync Run Tool and Windows Task Scheduler.
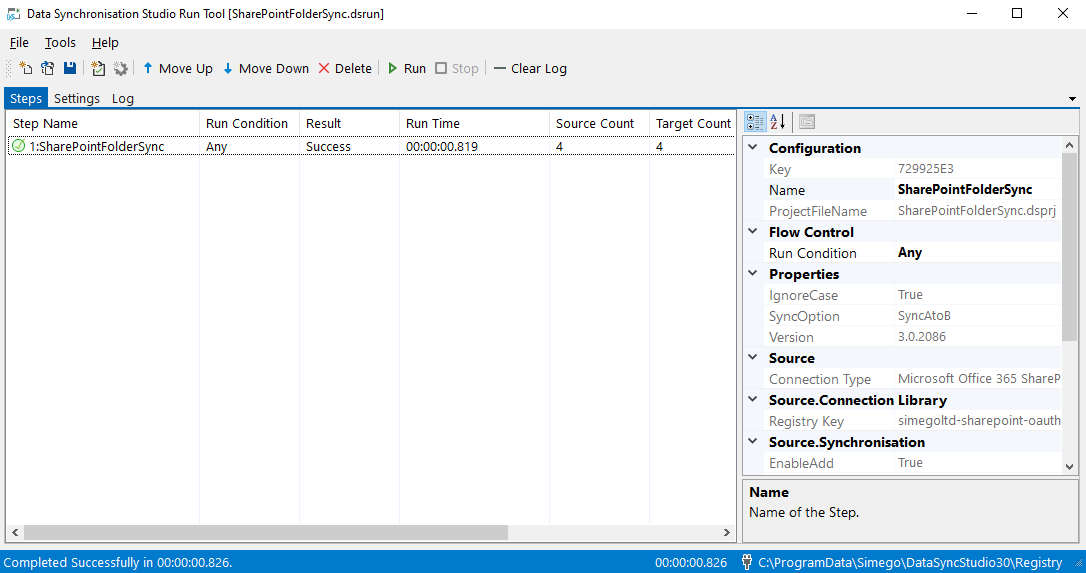
Run via RunTool
The Run Tool is an application used with Data Sync to build out your Data Processing pipelines. Each step in the pipeline is executed in sequence and you can use flow control status to control which steps are executed. See our Run Tool Documentation to find out more.
From your project in Data Sync go to Tools->Open in RunTool this will then open your project in the Run Tool. From here you can click the Run button to test that the project runs successfully.
To configure Windows Task Scheduler to execute your Run Tool project please see our guide Schedule a Run Tool Project with Windows Task Scheduler
Run via Commandline
You can also run your project via the commandline by passing the path to the Data Sync project file to the Simego.DataSync.Run.exe program like this.
%DATASYNCINSTALLPATH%\Simego.DataSync.Run.exe -execute "D:\DSProjects\myproject.dsprj"
Additional Configuration
Listview Threshold
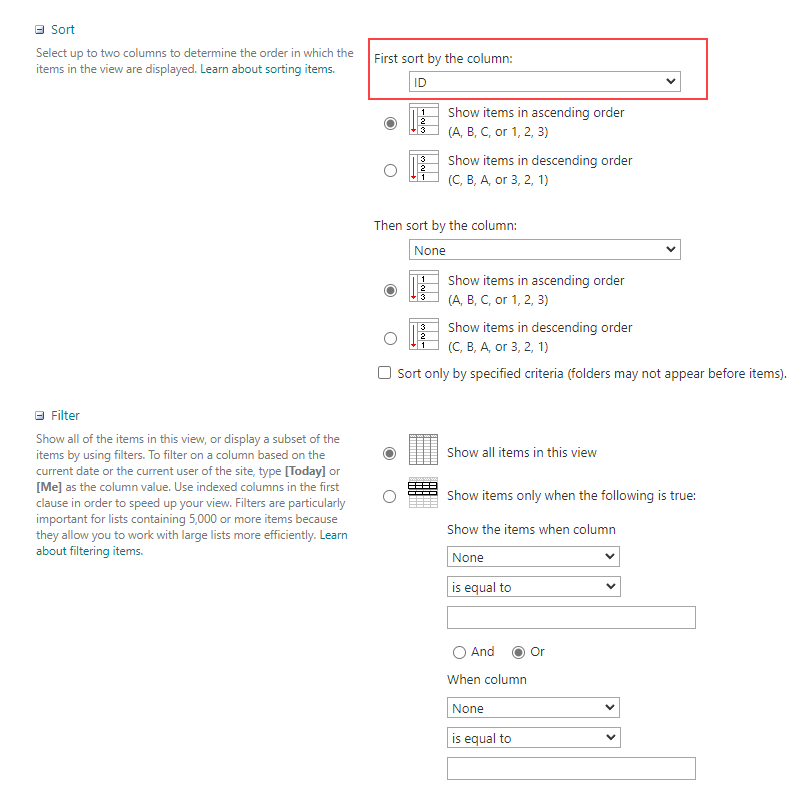
SharePoint has a Listview Threshold limit of 5000 items in a view, while a Document Library can store upto 30 million documents. Data Sync can read more than the 5000 item limit provided there is no filter or sort on the view. Ensure that you set the sort column to the ID column and remove any filters for Data Sync to read more than the Listview Threshold limit.
Filter Documents
You can filter documents on the source through the use of a SharePoint View. However be aware of the Listview Threshold Limit of 5000 items, if you have more than 5000 items make sure that you add a index in SharePoint for the columns you are using in the filter.
Once you have defined the view in SharePoint you can select this view from the View list on the source SharePoint connection.
Online Documentation
We have further information for the SharePoint connector in our online documentation.
If you want to synchronise a File System to a SharePoint Document Library check out our other blog here.