Scheduled Import and Export for Dynamics 365
When integrating with Dynamics 365 (aka. CRM, dataverse or CE) you want to be able to set your projects up once and then be able to repeat them at regular intervals. You may have other systems relying on Data from Dynamics 365 or need to update Dynamics 365 with data from another source.
For example you might have a SQL Database where account records are updated and these need feeding into Dynamics. Alternatively you might need to get the contact records, that are updated regularly by the sales team, into another system to ensure it is kept up to date.
For the following example we are going to use Ouvvi to schedule, manage and automate a series of projects that update Dynamics on a regular basis. We cover how to configure the projects so that you can link two entities together, i.e. account and contact records.
We will also cover configuring projects to export data from Dynamics into a SQL table, XML file and Excel file and having these run at the start of the day.

Requirements
Before getting started you need to ensure you have the following:
- Windows 10 or Windows Server
- Downloaded & Installed Data Synchronisation Studio
- Installed Ouvvi Automation Server
- Access to Dynamics 365
If you do not have Data Synchronisation Studio you can get a free evaluation edition. To test Ouvvi during a trial please contact us to discuss upgrading your evaluation license.
Considerations when Importing Data into Dynamics
You can quickly and easily synchronise your business data into Dynamics 365 (CRM / CE/ Dataverse) when you use Data Synchronisation Studio.You need to consider which columns you want to be updating within the entity and if those columns are relational fields that lookup their values in a different entity.
For example, contact needs the account to already exist in the contact entity. If the value doesn't exist then an error will be thrown The remote server returned an error: (400) Bad Request.
So the account entity needs to be updated before the contact entity.
To get around this type of issue you need to look at the structure of your Dynamics 365 site and plan your integration accordingly.
This is where Ouvvi is invaluable as you can contain each Data Sync project as a step, add descriptions to the overall project and individually on each step, and execute the whole process in a sequence. This ensures entities are updated in the correct order to prevent errors.
Below we cover creating your project and steps within Ouvvi and how to configure an example Data Sync step to connect to update data in Dynamics 365.
Although we use a SQL table in this example you can use any of the other connectors as your source. This might be Active Directory, a SharePoint List, a CSV file or a Dynamics Entity to mention a few. Just select the connector you need, enter the required connection details and you're ready to go.
Ouvvi Configuration
We need to start by creating our Ouvvi project to hold each Data Sync step in the integration. To do this open Ouvvi and go to Projects > All Projects > New. Enter in a Name for your project and click Save to continue.

You then need to add a Data Sync step. For this integration project there are going to be multiple Data Sync steps that will need to be configured to connect to the source data and the relevant Dynamics entity.
For the purpose of this article we will only focus on the configuring of one step, but the process should be the same for each step in the project.
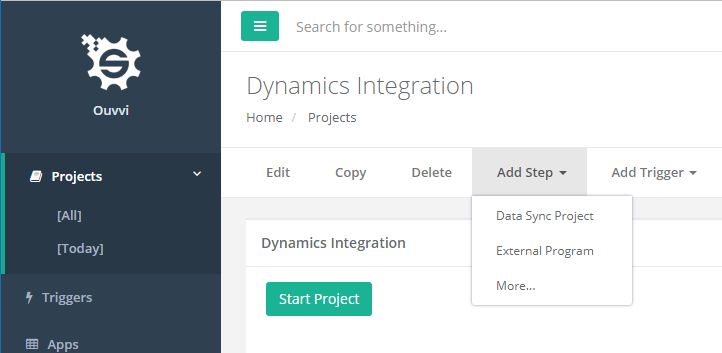
To add a Data Sync step go to Add Step > Data Sync Project and then enter in a name for the project and click Save.
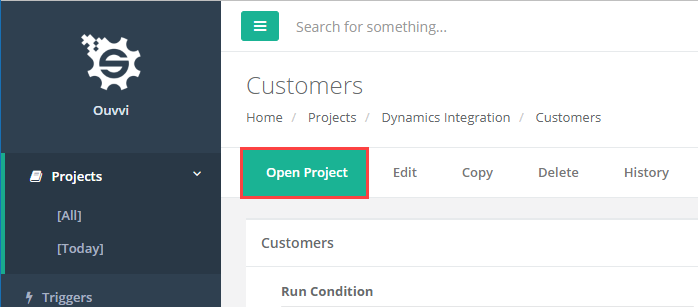
Then open the project by clicking Open Project.
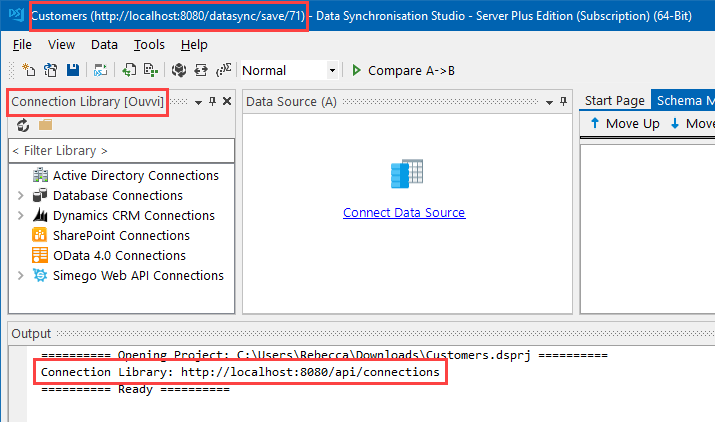
When Data Sync has downloaded from Ouvvi and you open the file, you should find that it shows as connected to Ouvvi.
You can check this in four locations:
1- The title bar
2- The connection library
3- The output window
4- The bottom right of the window
You can now configure the project within Data Sync.
Connect to your Source Data
In this example we will be configuring the project to import customers from a SQL table into the Dynamics Customers entity. Please note that you will need to have configured the Accounts import first to ensure this runs without errors. As if you try to lookup the account and it doesn't exist in Dynamics an error will be thrown.

To do this we need to start by connecting our Source window to our SQL table. Click onto Connect Datasource to open the connection window, then navigate to SQL Database > Microsoft SQL Server (SQL Client).
Enter in the network name of your SQL Server, any credentials you might need to connect and set encryption or trusted certificate as required.
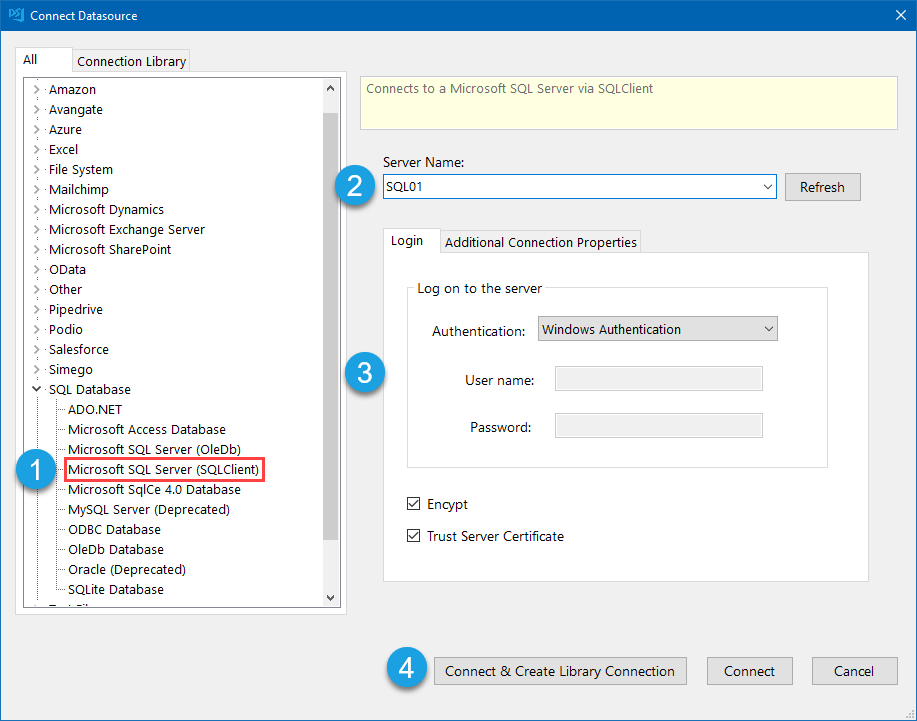
Click Connect & Create Library Connections to save this database connection to the connection library. This only needs to be done once per database and will make future project setup easier.
Select the database and table from the tree view to connect to, and if you are saving to the connection library another window will open where you need to enter a name in for the connection.
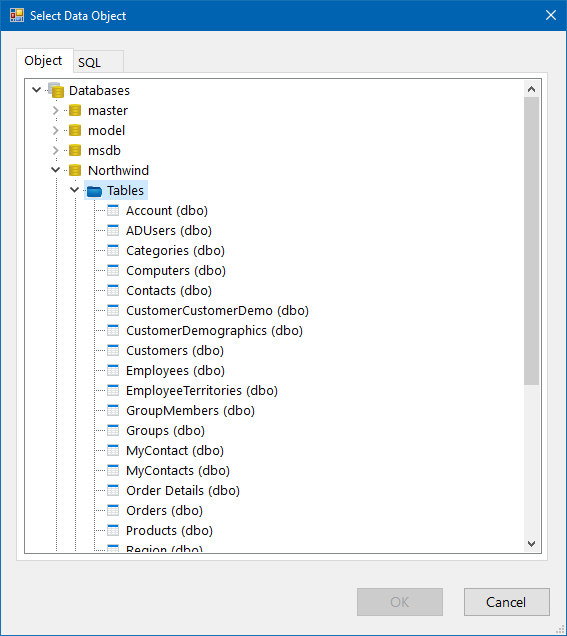
This will load the columns in your SQL table into the source window.
Connect to Dynamics
Now we need to connect to Dynamics. If you haven't configured your connection to Dynamics please see our documentation pages for the full connection guidance details to create your Azure Application.
Once you have the OAuth connection details from your Azure app click onto the target window and go to Microsoft Dynamics > Microsoft Dynamics 365. Enter int he URL to your Dyanmics site and Data Sync will add the relevant parameters to connect to the SOAP/WCF Service. Select the custom OAuth Application type from the drop-down and then add your connection details.
In this example we are using the client credentials flow so we add the ClientID, Client Secret, Token URL V2 endpoint and change the grant type to client_credentials. Make sure to clear the Redirect URL of any text and then click Authorise Connection
You can then select the entity to connect to, in this case Contact and then save the connection to the connection library by clicking Connect & Create Library Connection. As we are connected to Ouvvi, this will save the connection to the Ouvvi Connection Library. You only need to save the connection to your Dynamics site once as you will be able to access all of the entities from the one connection.
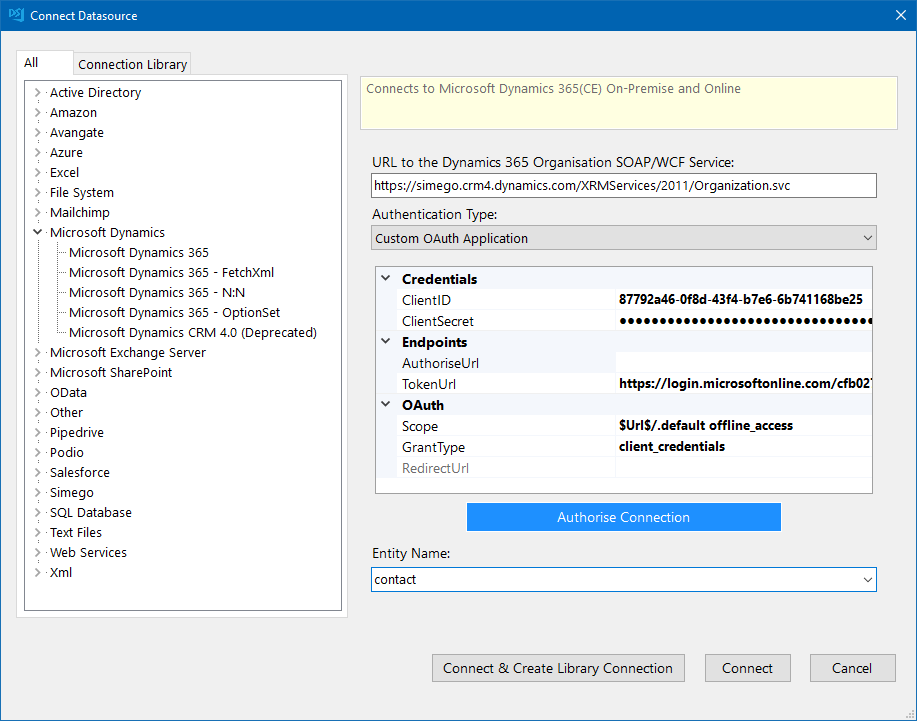
If you already have saved your connection to the connection library, you can either drag and drop the contact entity onto the target or right click and select Connect to Target (B)
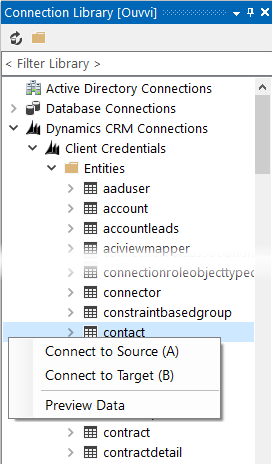
Create the Lookup to Account
Now we need to lookup the account IDs in the account entity of Dynamics. To do this we can drag and drop the account entity from the connection library onto the account id column in the source.
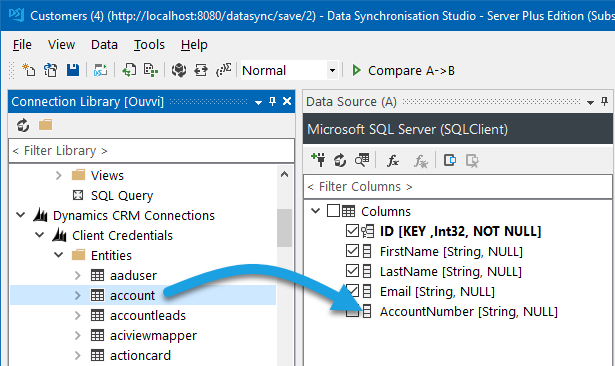
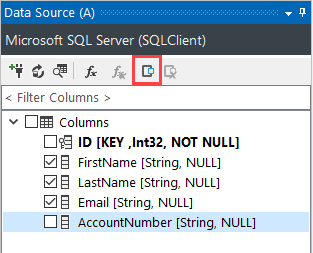
Alternatively you can lookup the account by selecting the column to lookup and then clicking onto the lookup button in the source window. You then select the connection to Dynamics from the connection library tab and select the entity to connect to.
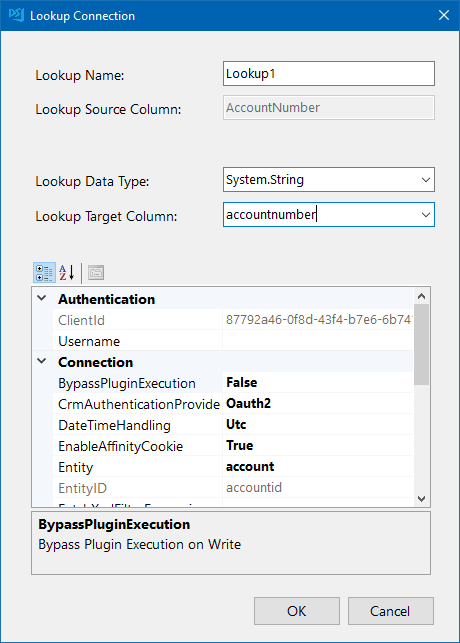
Then to configure the lookup select the target column that will contain the values to be looked up and click OK.
You can then access all of the columns from the entity you looked up the values for and add these to the schema map as needed. For this scenario we need the AccountID to link the contact to the right account in Dynamics.
Map the Source & Target Columns
The next step is to configure the schema mapping to make sure the columns you need are added and mapped to the corresponding fields in Dynamics.
You also need to make sure that a key column has been selected that can be used to identify each record as unique. In this case this is the ID column as this will be unique. You could also use email, or use a composite key such as the lookup1_accountid and the email column if you don't have an external identifier available.

Preview the Results and Sync
We now need to preview the results and test synchronise a couple of records to make sure the project is configured correctly.
To do this click onto the Compare A > B button in the toolbar. This will open the comparison results tab where we can preview the changes that need to be made to make the target (Dynamics) the same as the source (SQL).
You will be able to preview any adds, updates or deletes that need to be made by clicking onto each option. Please note that deletes are disabled by default but will still display in the results. If you want to enable deletes then please set EnableDelete to true in the target connection properties.
For this example we have 546 records to add, 0 to update, and 1 record to delete. As deletes are disabled this record will not be included in the sync.
If there are no linked accounts for your contacts, then the account does not currently exist in Dynamics. The corresponding accounts should be added in the account project that will be run before this one. So when the whole integration project is run from Ouvvi, the accounts will be added first and the correct AccountID will be added to these records. If the account is added at a later date then this will be updated in a future run of the project.
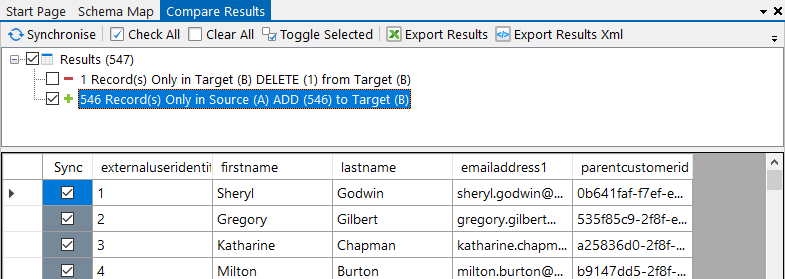
To test that the sync will work as expected we can deselect the updates and additions and just add a single record from each. To do this click onto the additions (or updates) and select deselect all. Then check the checkbox against a record.
You can then click Synchronise and Start to sync the record selected.
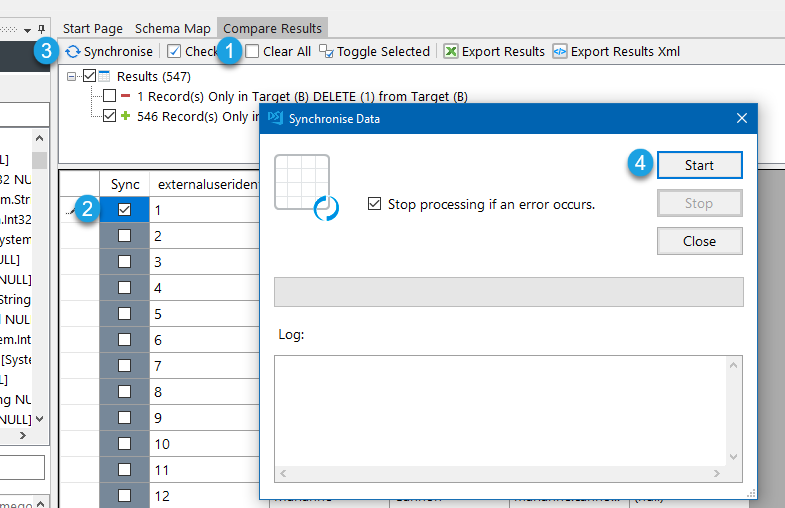
As that went through without an error, we can now save the project and go back to Ouvvi. Refreshing the page in Ouvvi will show the project details, and you can now configure your remaining projects for the integration.
Once all the projects are added you can run the whole sequence by clicking onto the Start Project button.
Next we will configure the trigger to schedule the project automatically.
Schedule
Once all the projects have been built and added to Ouvvi you can schedule it to run on a regular basis. For this example I want the project to run at the start of the day.
To do this we need to add the Start of Day Trigger by going to Add Trigger > Start of Day.
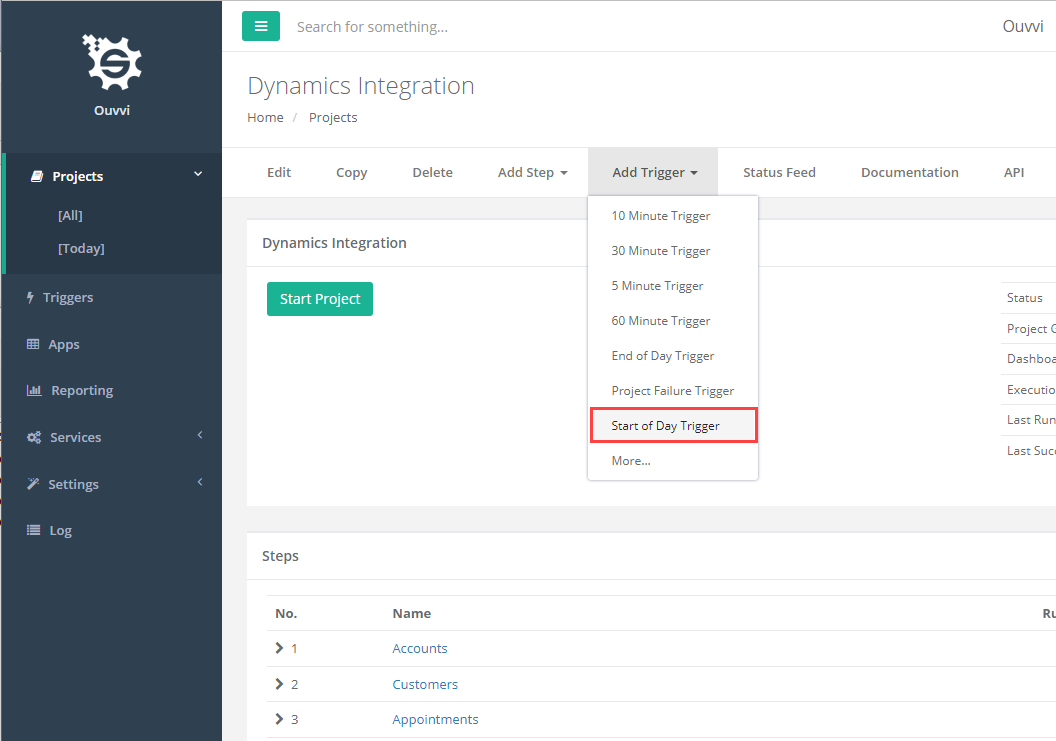
The start of day time is configured in the system settings of Ouvvi, and by default this is set to 8am. To change this to a different time please change the time in the system settings.

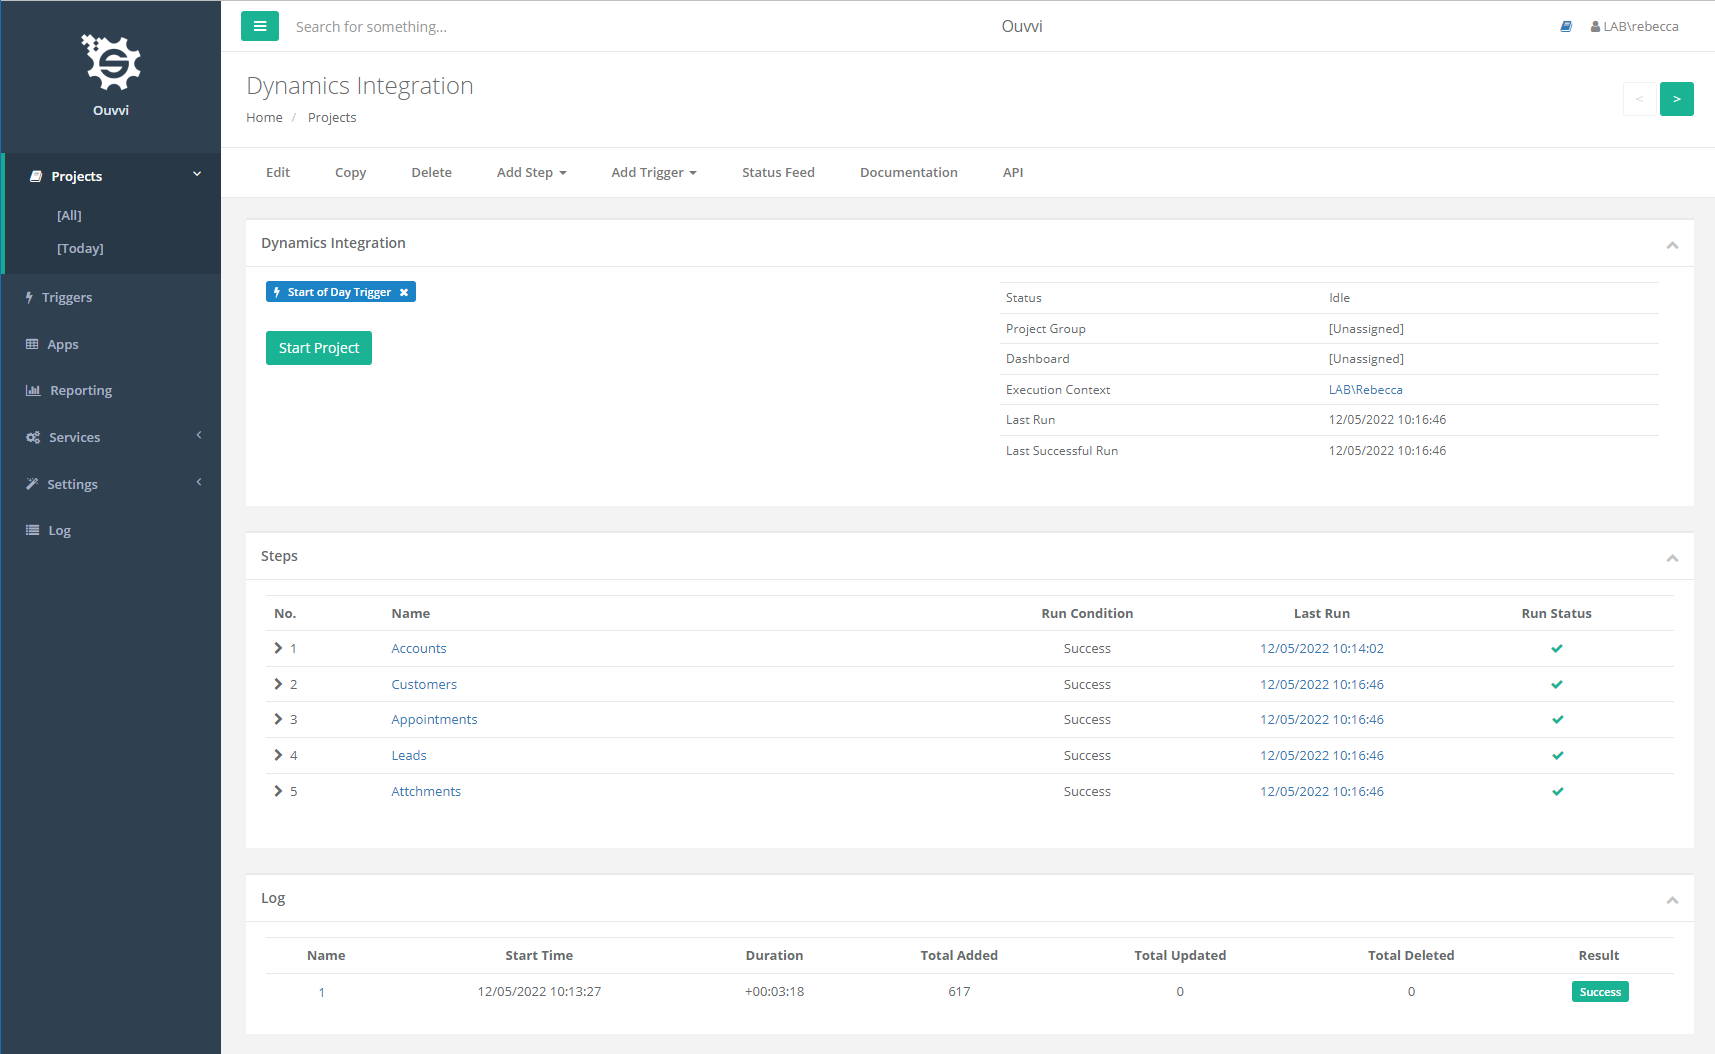
Once the trigger is added to the project it will run everyday at the specified start of day.
Your final Ouvvi project might look something like this:
Exporting Data from Dynamics
As well as being able to import data into Dynamics it is likely you also want to export data from your Dynamics entities. Below we will briefly cover the options you have to setup a regular export of your Dynamics data.
You will want to contain your export projects within Ouvvi so that they can be automated and run at a set schedule, please see the details in the previous section on how to add and configure Ouvvi projects. You can see the details on adding a trigger here or for more detailed documentation please take a look at our training pages.
Below I am assuming you have already created an Ouvvi project to hold your Data Sync projects and just need to configure an export project.
Connect to Dynamics
If you haven't configured your connection to Dynamics please see our documentation pages for the full connection guidance details to create your Azure Application.
Once you have the OAuth connection details from your Azure app click onto the target window and go to Microsoft Dynamics > Microsoft Dynamics 365. Enter int he URL to your Dyanmics site and Data Sync will add the relevant parameters to connect to the SOAP/WCF Service. Select the custom OAuth Application type from the drop-down and then add your connection details.
In this example we are using the client credentials flow so we add the ClientID, Client Secret, Token URL V2 endpoint and change the grant type to client_credentials. Make sure to clear the Redirect URL of any text and then click Authorise Connection
You can then select the entity to connect to, in this case Contact and then save the connection to the connection library by clicking Connect & Create Library Connection. As we are connected to Ouvvi, this will save the connection to the Ouvvi Connection Library. You only need to save the connection to your Dynamics site once as you will be able to access all of the entities from the one connection.

If you already have saved your connection to the connection library, you can either drag and drop the contact entity onto the target or right click and select Connect to Target (B)

Then add the columns you want to be included in the export to the schema map.
Export Options
You have a couple of options to export your data. You can either do a one off export and export to a CSV, Excel, XML or JSON file from the preview tabs; you can use the quick functions from the tools menu e.g. Create CSV File to create a new data source based off the schema properties; or you can connect to an existing data source.
Single Export to File
To do a one off export from the preview just click onto the Preview A button in the schema map to preview the columns added to the schema map. Alternatively you can export every column from your entity by clicking onto the Preview button in the data source window.
In the preview window you can then choose between exporting to an XML, CSV, Excel or JSON file. Just click onto the corresponding button and choose where you want the file to be saved. Your data will then be exported to this file.

Export to a New Data Source
To create a new data source using the tools menu, just click onto Tools and select the option you want to use. For this example we will create a new CSV file so can use the Create CSV File option.
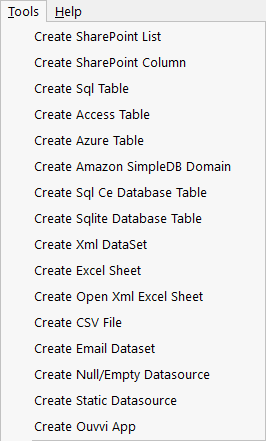
You just need to define a name for the file and select where it should be created and this will be loaded into the data source B window. The columns created will be based upon the columns you added to the schema map previously.
To synchronise the data to the file just click Compare A > B > Synchronise > Start. You can then save and schedule this project to run in Ouvvi whenever you need it to.
Export to an Existing Data Source
To export to an existing Data Source you need to connect the target to that source. For example this might be a SharePoint list.
Click onto the target window to open the connection window and go to Microsoft SharePoint > Microsoft Office 365 SharePoint Online and add the required connection details. Full connection details can be found in our documentation pages.
Map the columns from Dynamics to the corresponding columns in SharePoint and make sure to define a key column that can be used to uniquely identify each record. You can select a combination of columns to make a composite key if you do not have a column in SharePoint that can take the Dynamics ContactID.
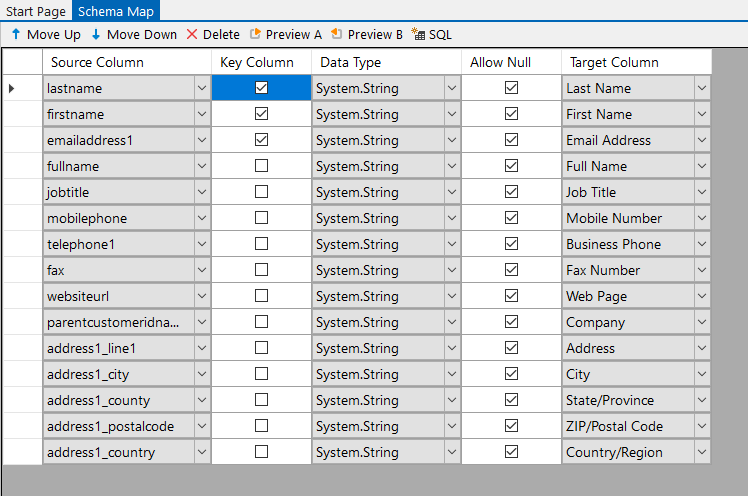
You can then preview the results by clicking Compare A > B and either run the sync now or save the project and return to Ouvvi to schedule it to run at a later time.
Troubleshooting
Below are a couple of errors/issues you might come across and how you can go about resolving them.
Permissions - Execution Context
If you are finding that your project is failing in Ouvvi but not when you run it locally, then it is likely that your service agent does not have permission to access the resource you are connecting to.
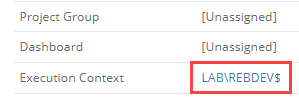
You can see what the error is by clicking onto the log instance and viewing the log output. For example, this project connects to a SQL database but the user LAB\REBDEV$ does not have permission to access the database so the project has failed.

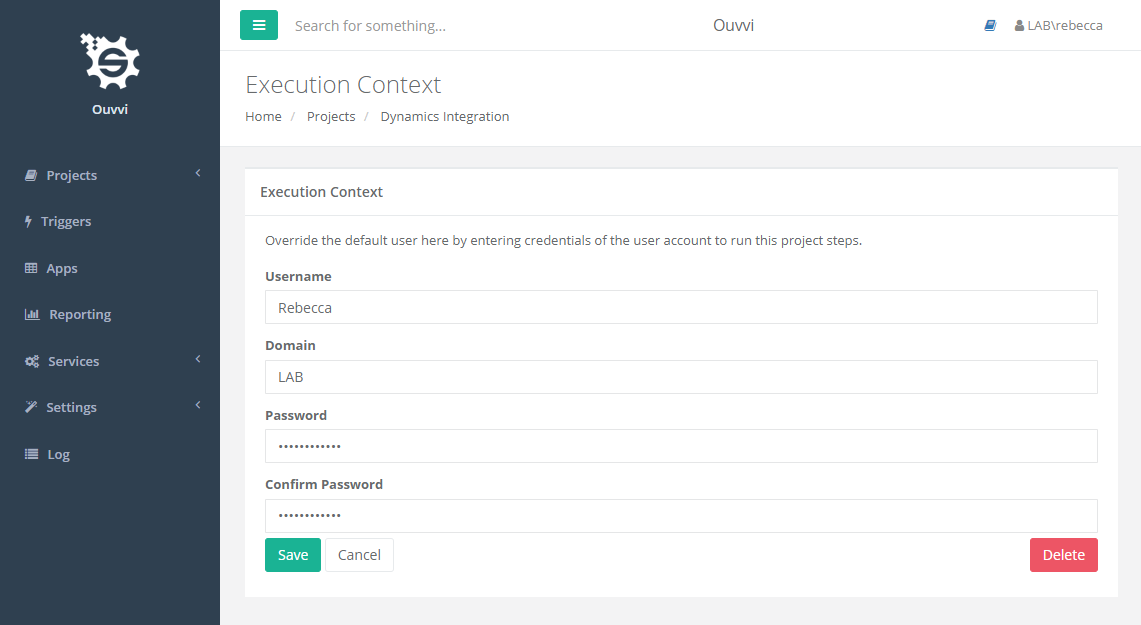
To fix this you can either add the service account to the SQL database or you can change the execution context of the project. To do this click onto the execution context to add specific user details for the project to run under.
Greyed Out Start Button
Another common issue is that the start button of the project is greyed out and cannot be clicked. This is usually because the services are not running or the instance does not have an active license key.
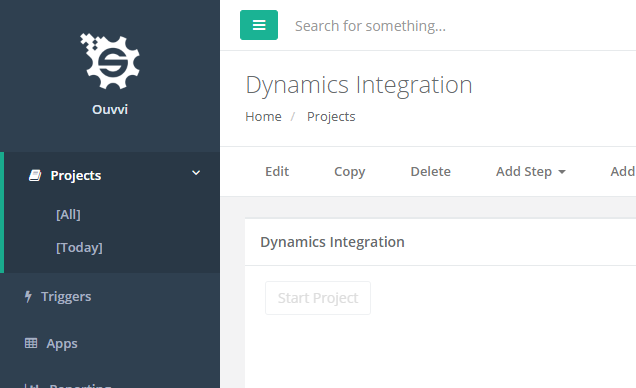
To start the services open the deployment manager, select your Ouvvi instance and click the green play button. Alternatively right click and select Start Service.

To check if there is a license key activating the instance please go to Settings > Register License Key and you should see a green tick next to the license key and a support and maintenance date on the page.
If you have any questions or want to know more please email us at support@simego.com or checkout our other blog posts.
